It's been nearly 30 years ago since I last did any serious painting & drawing (and even then just a couple of commissions of family/friend's pets using pencil or charcoal) and before that, art in high school (... 47 years ago) so it's back to the drawing board (doh) and get a bit of practice in.
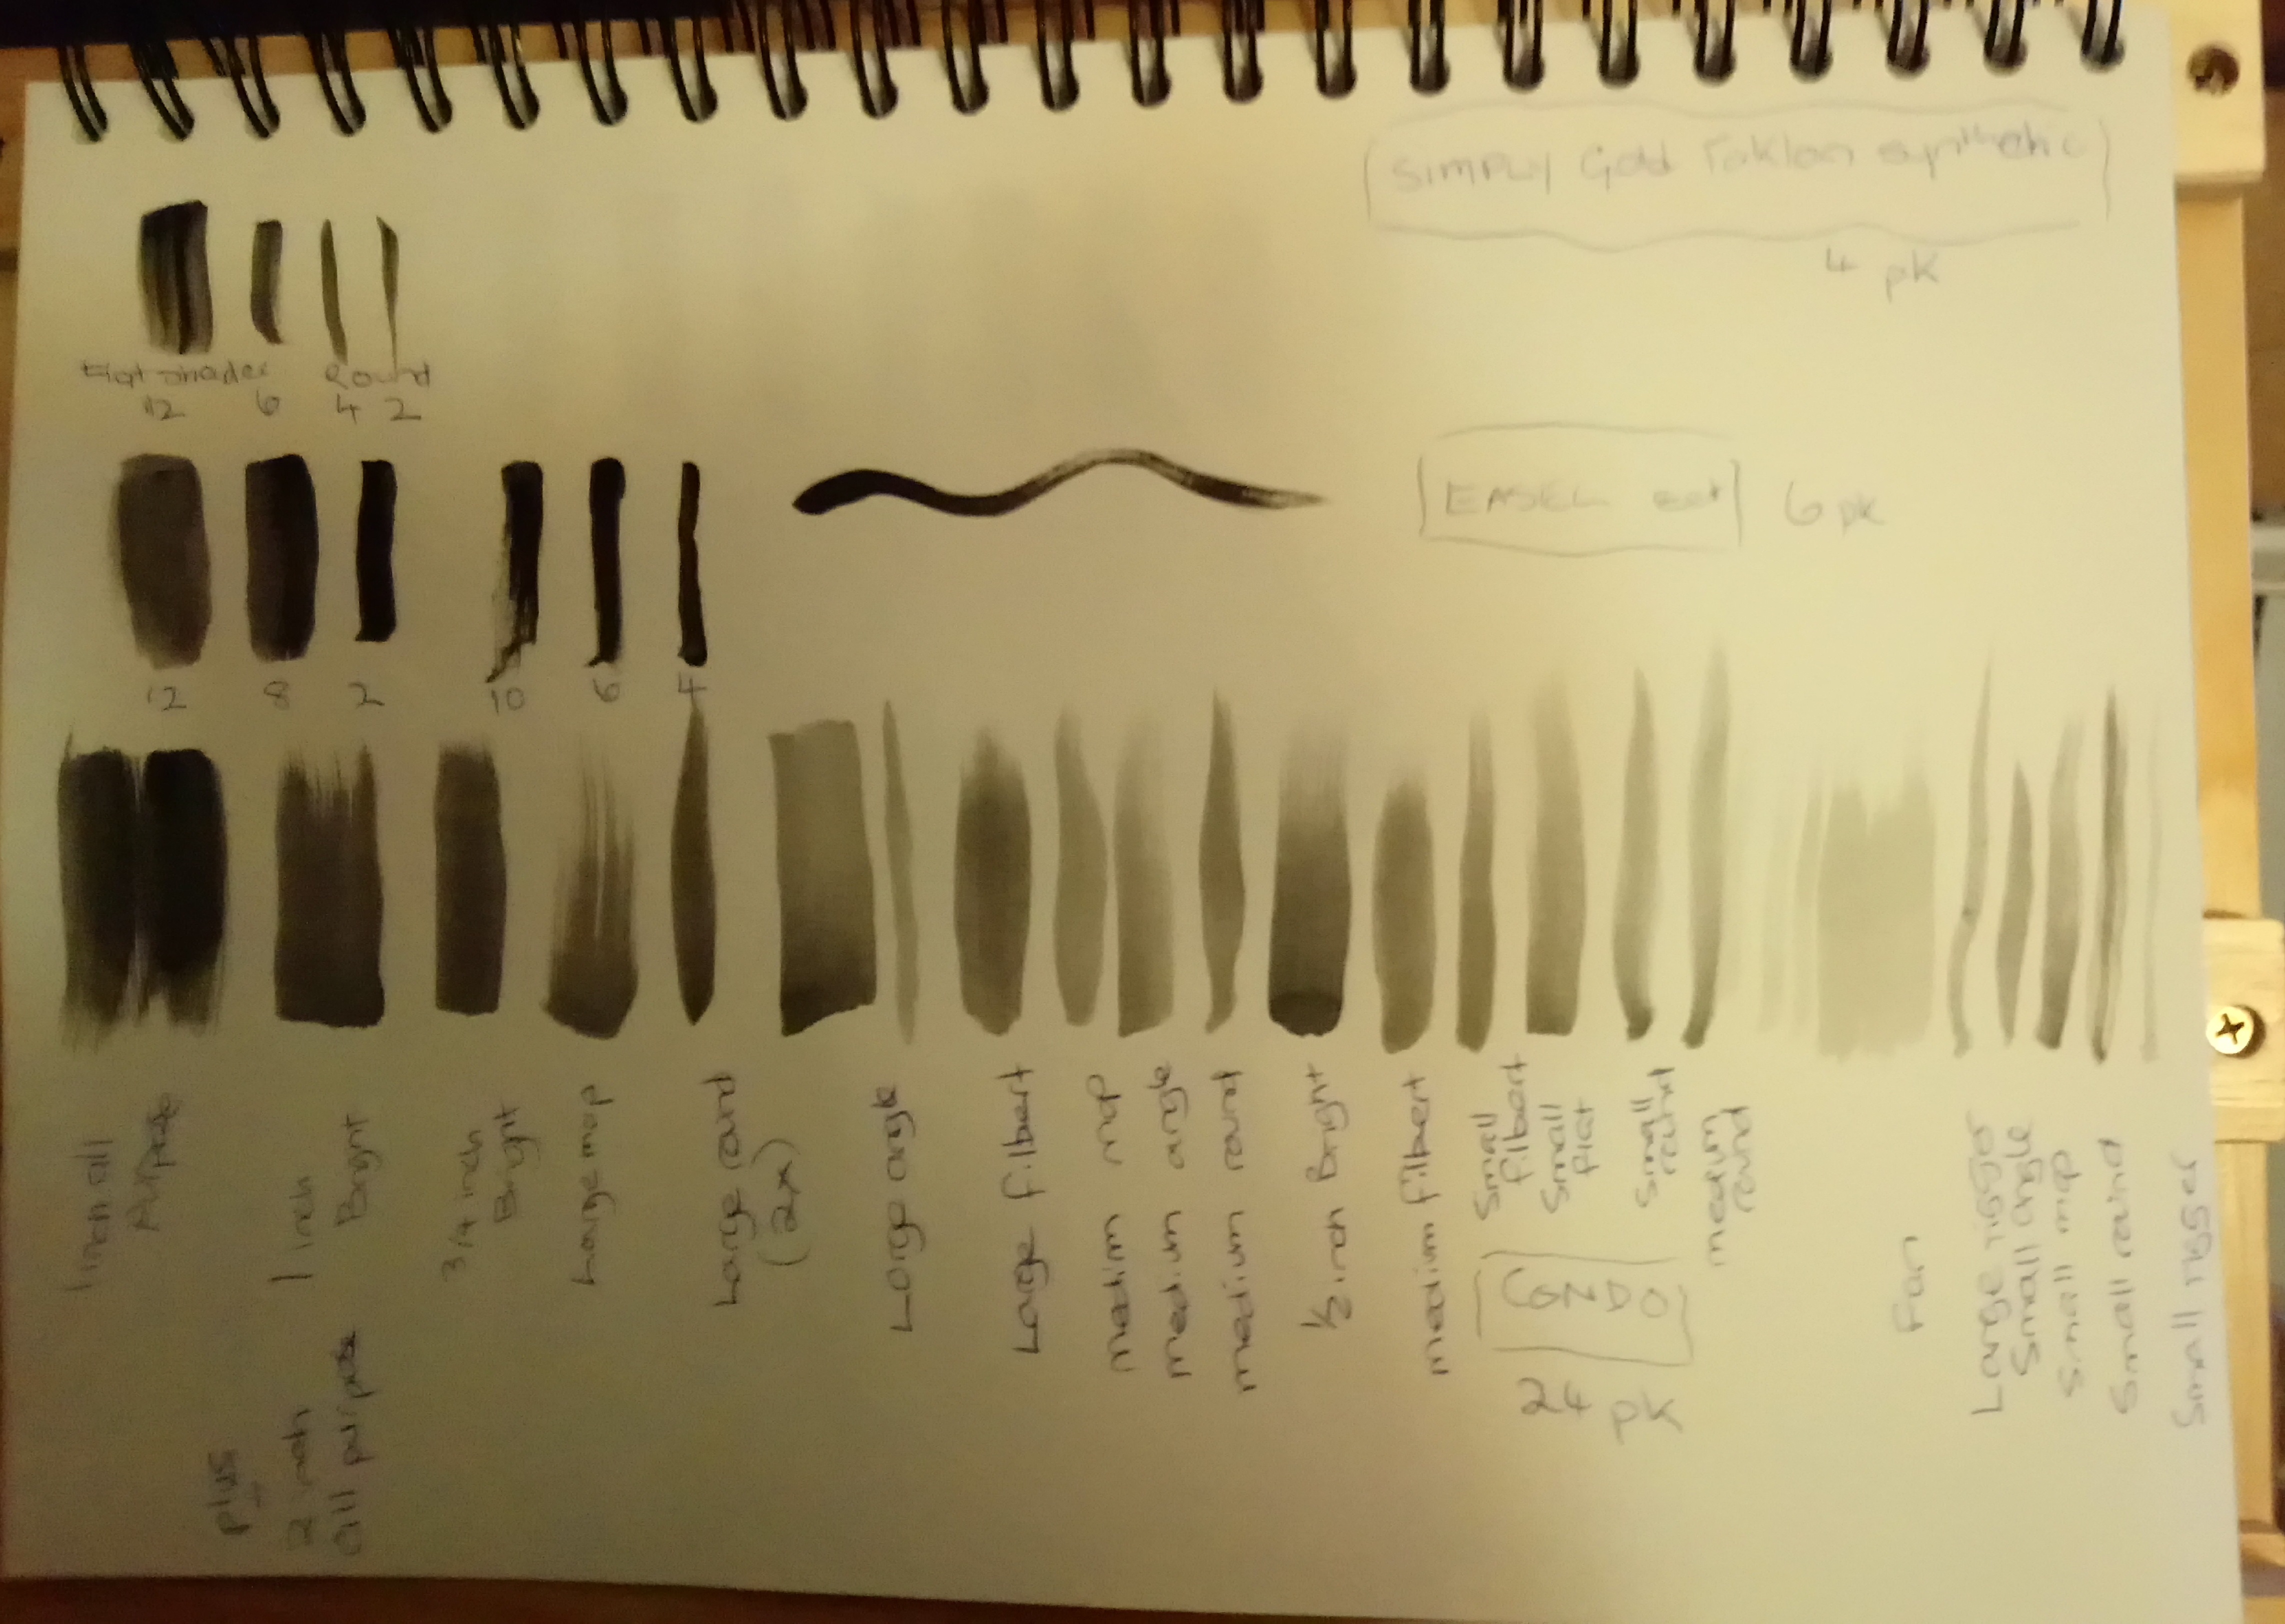
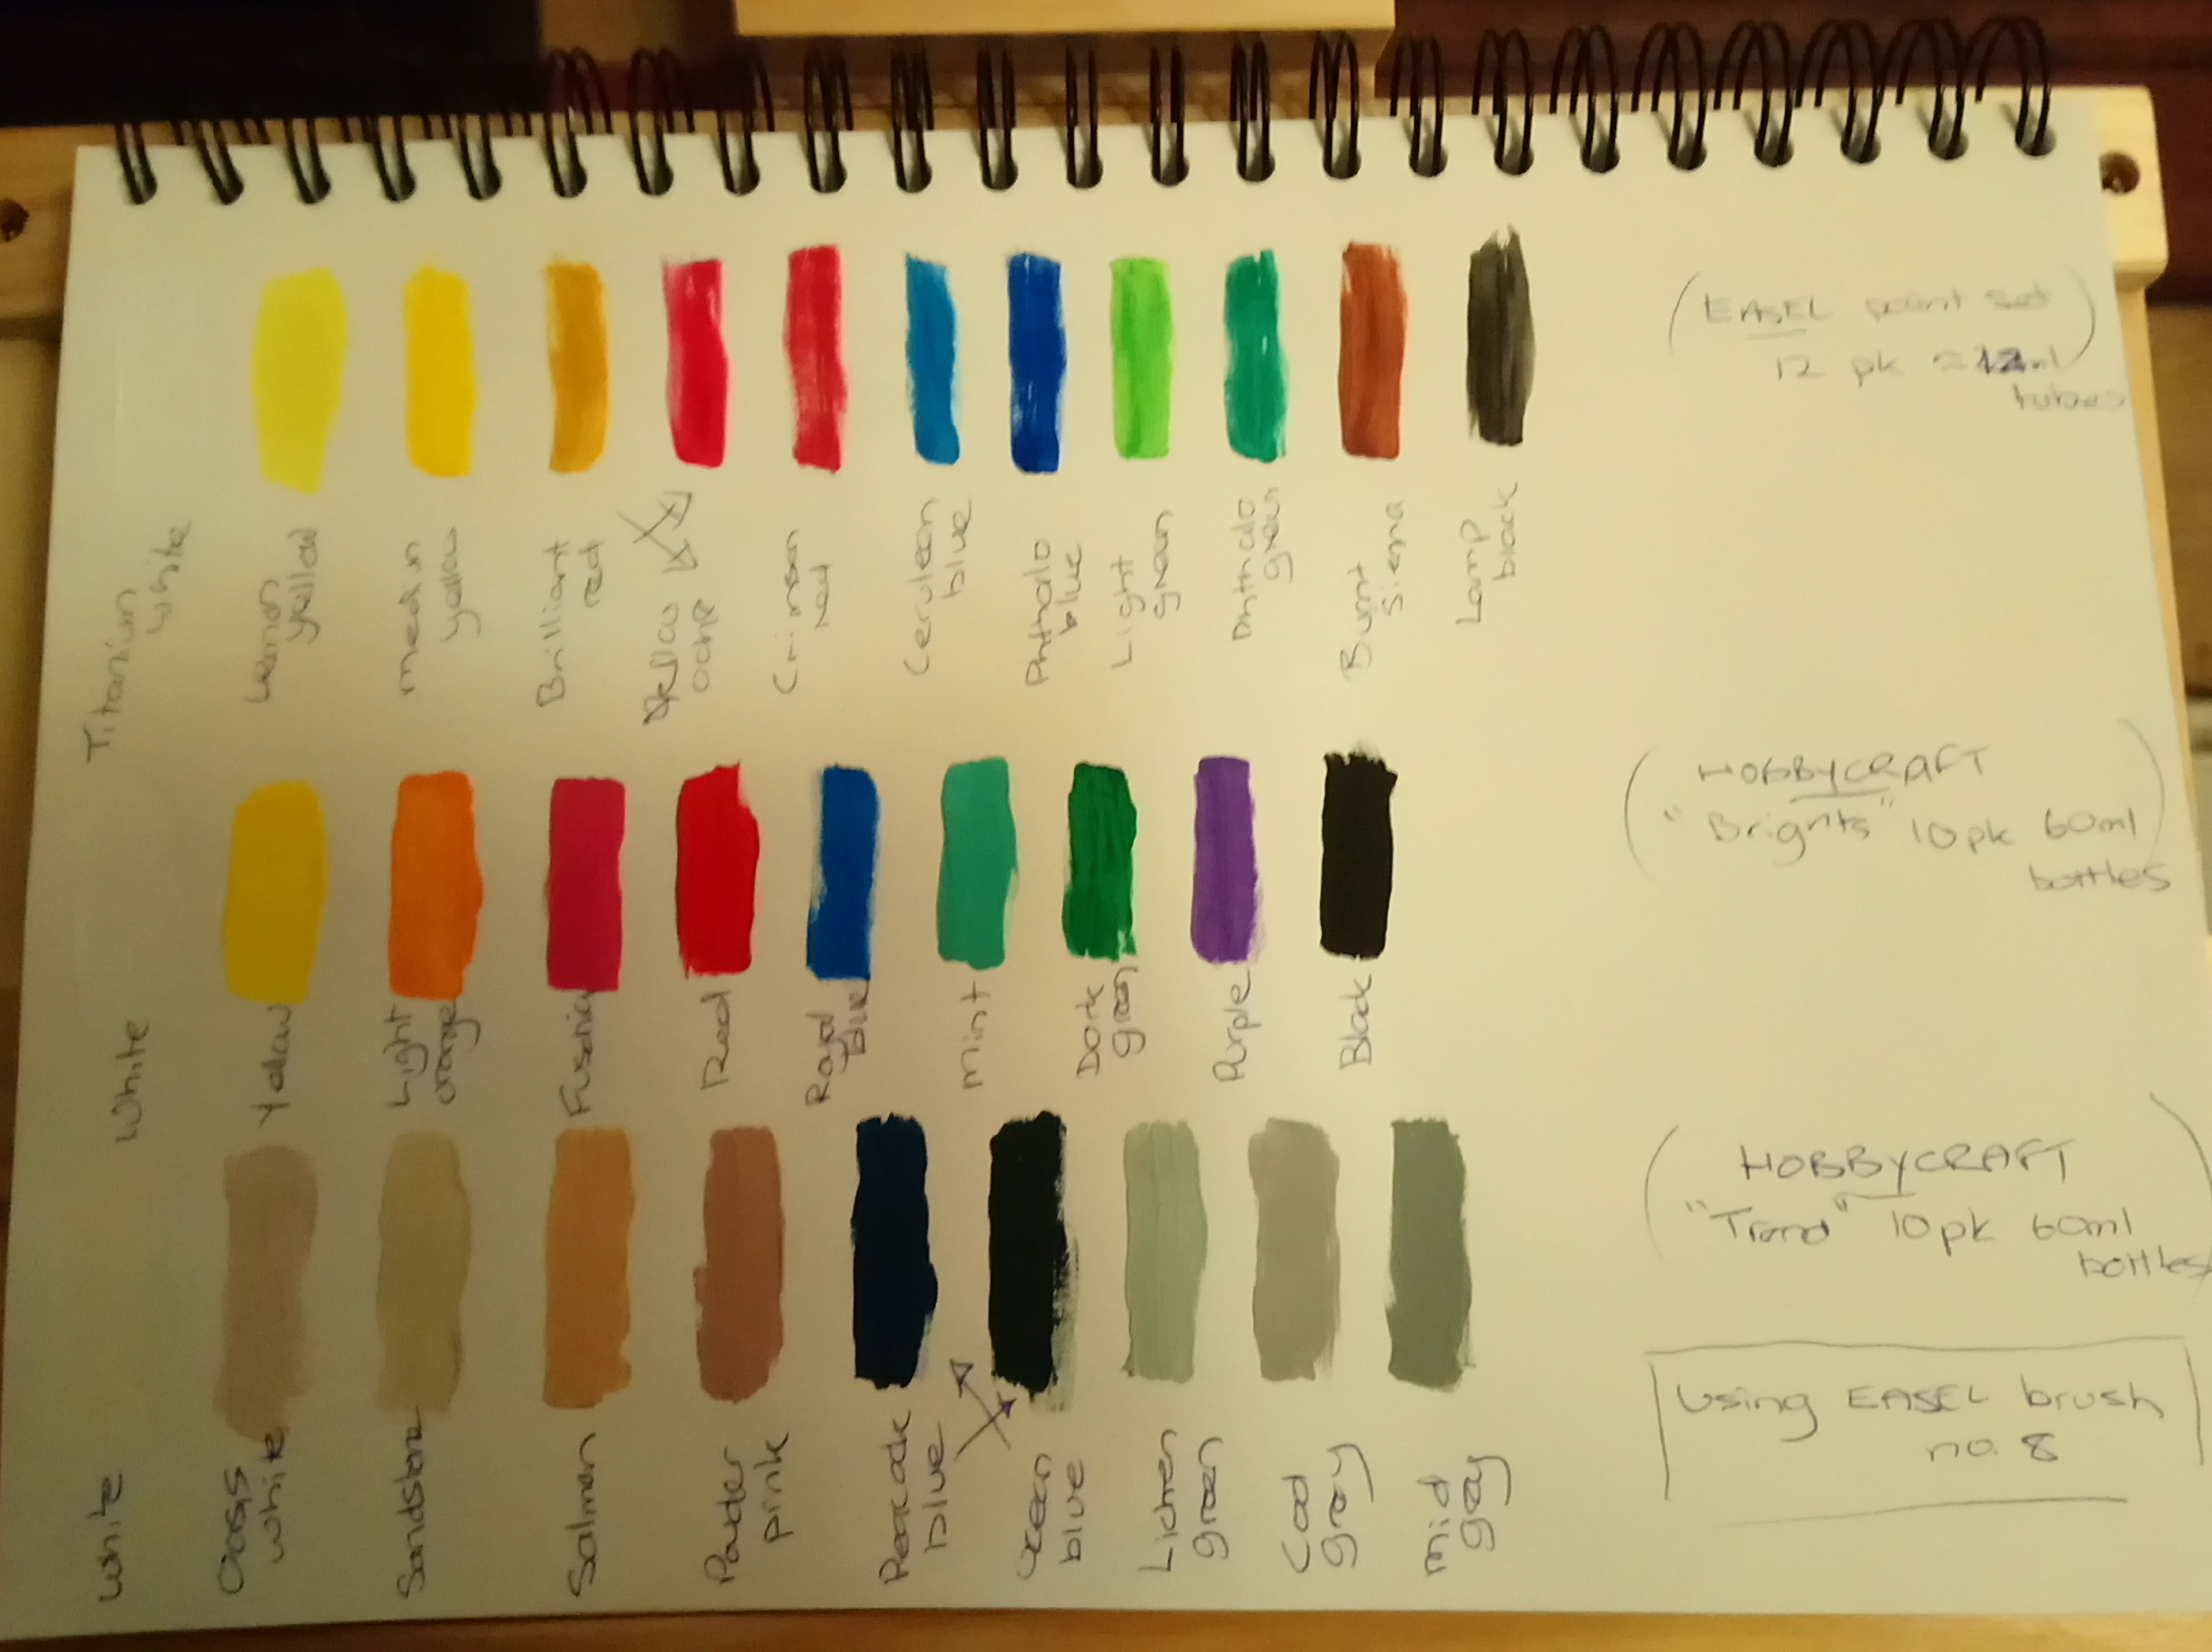
First, I played around with the pencils, charcoals, paintbrushes (I don't remember having such a wide selection of different paintbrushes (and sizes) when in school so all new to me to find out how they all work) and finally, all the different paint colours (acrylic):
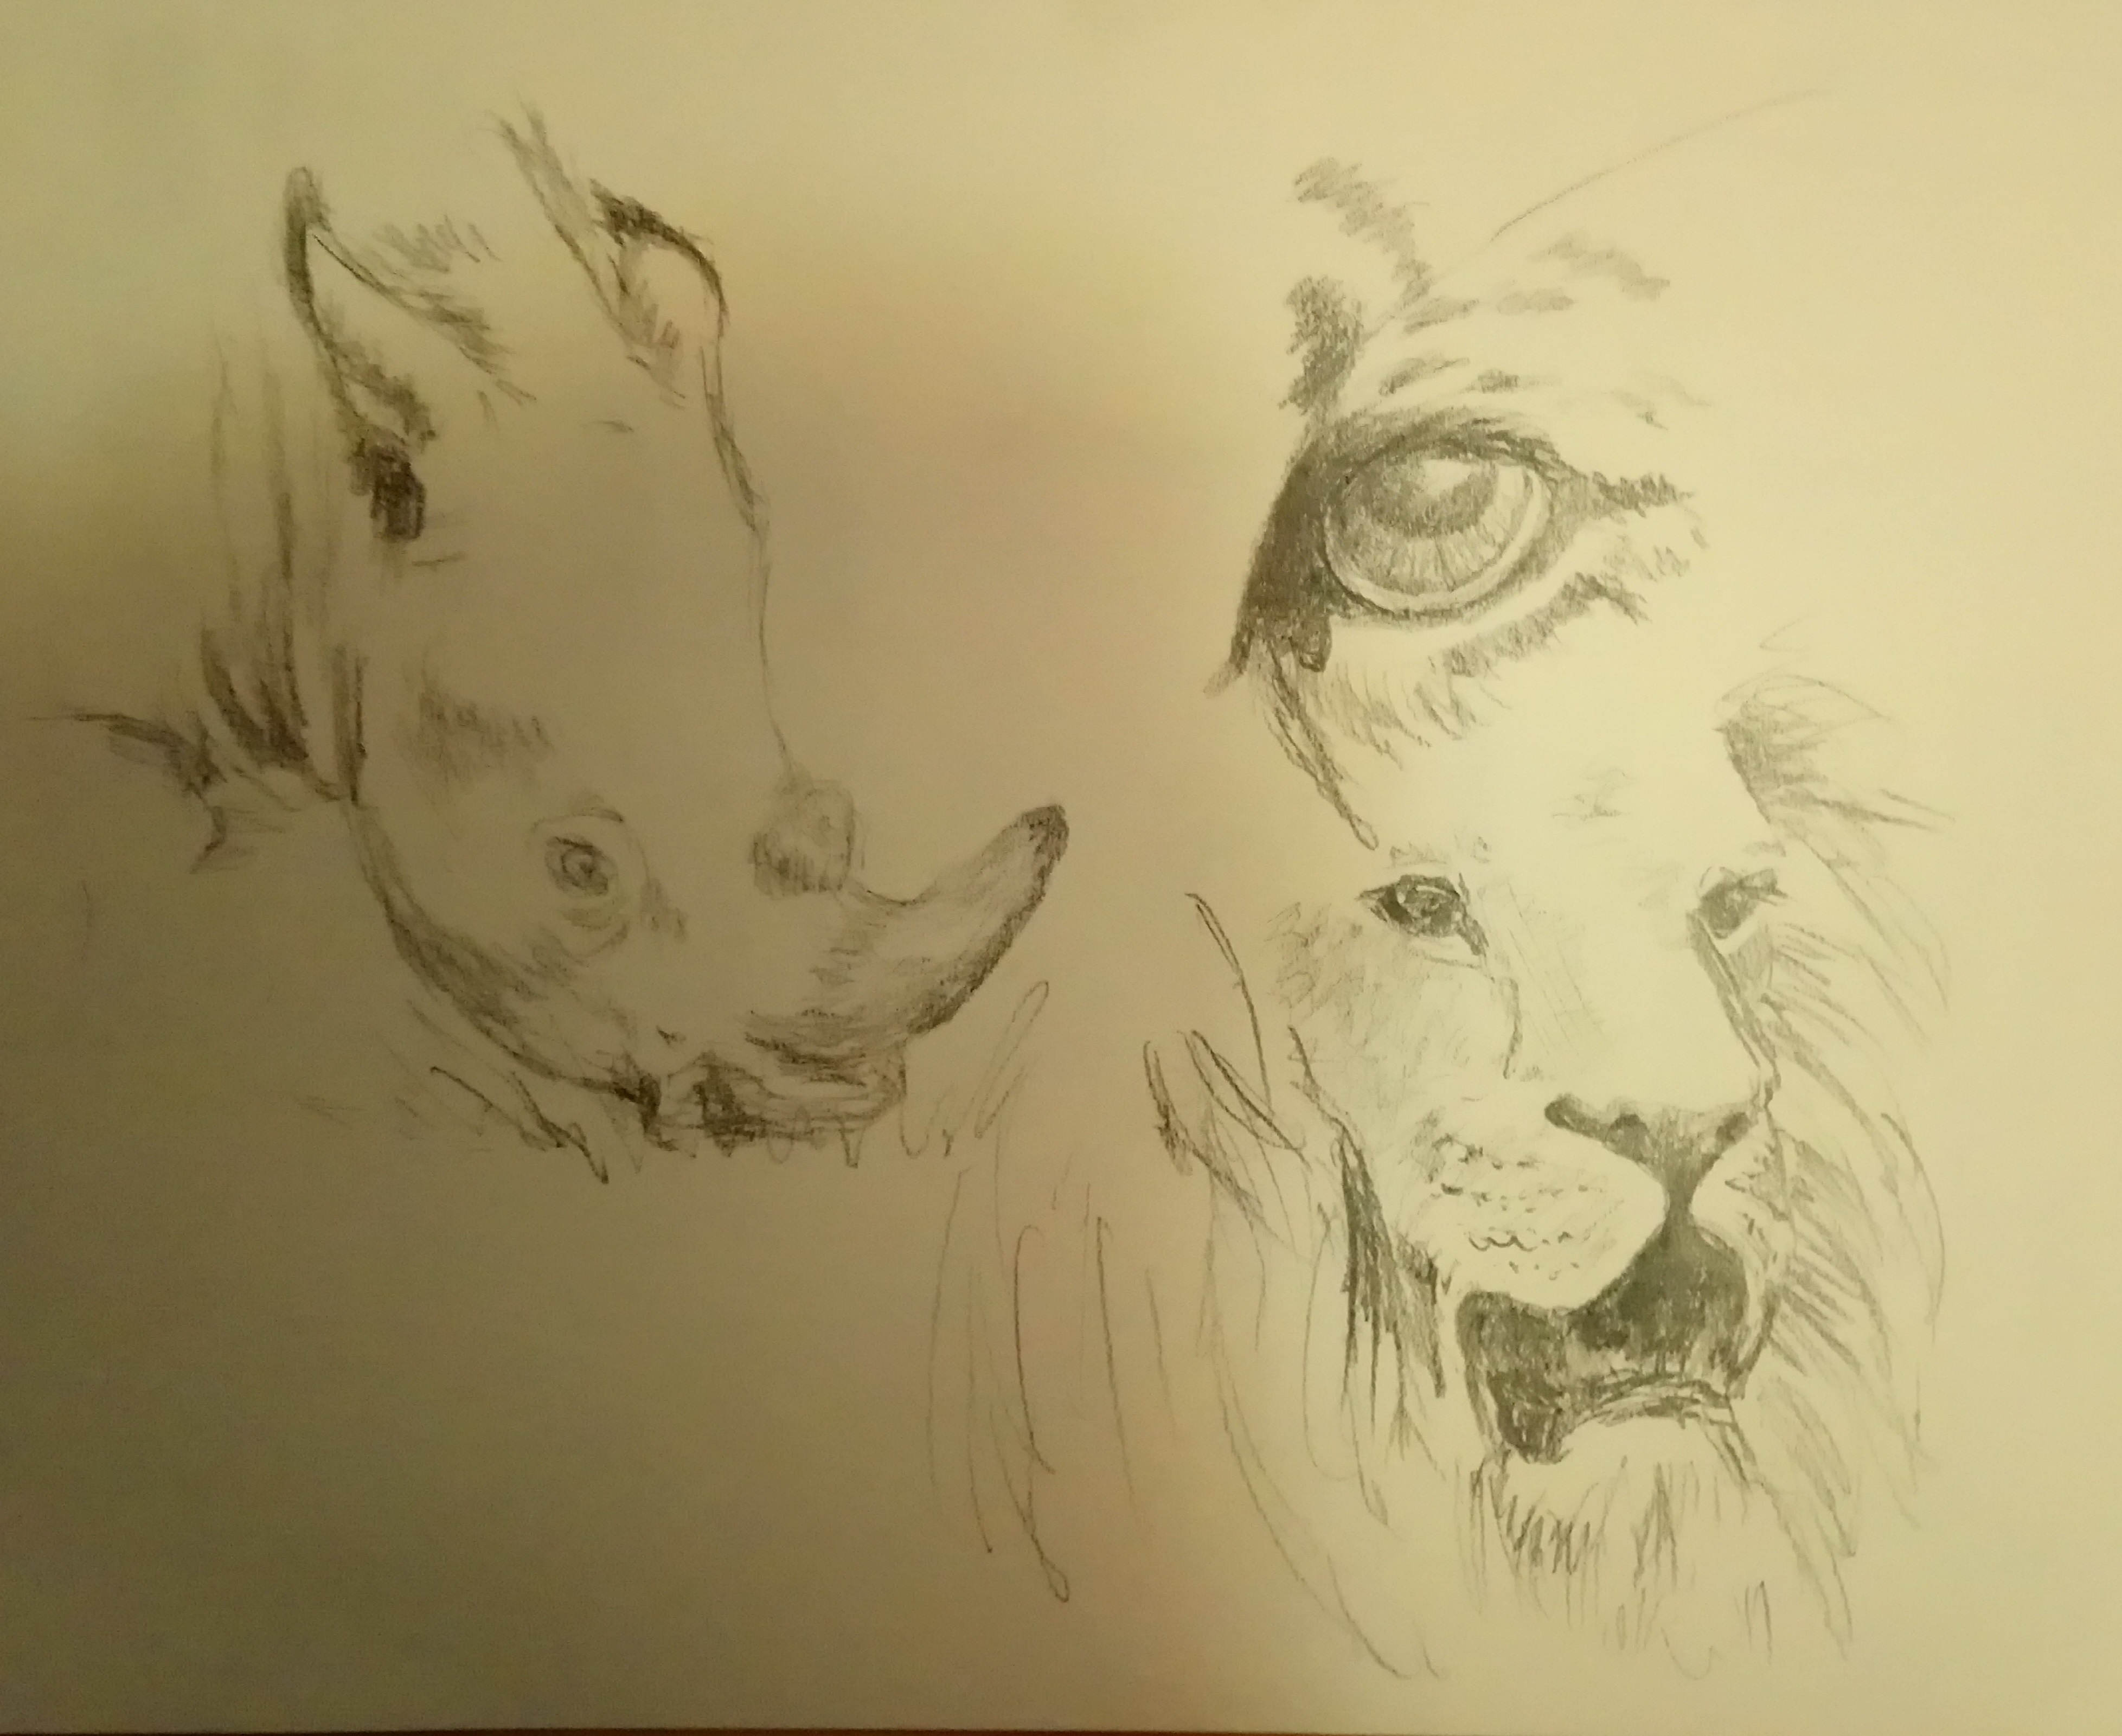
Then it was time to try my hand at drawing - just a few quick sketches from photos (off a calendar) - a rhino, eye of a leopard and a lion (I'm not too happy with the lion's mouth but overall I think I got the dimensions)
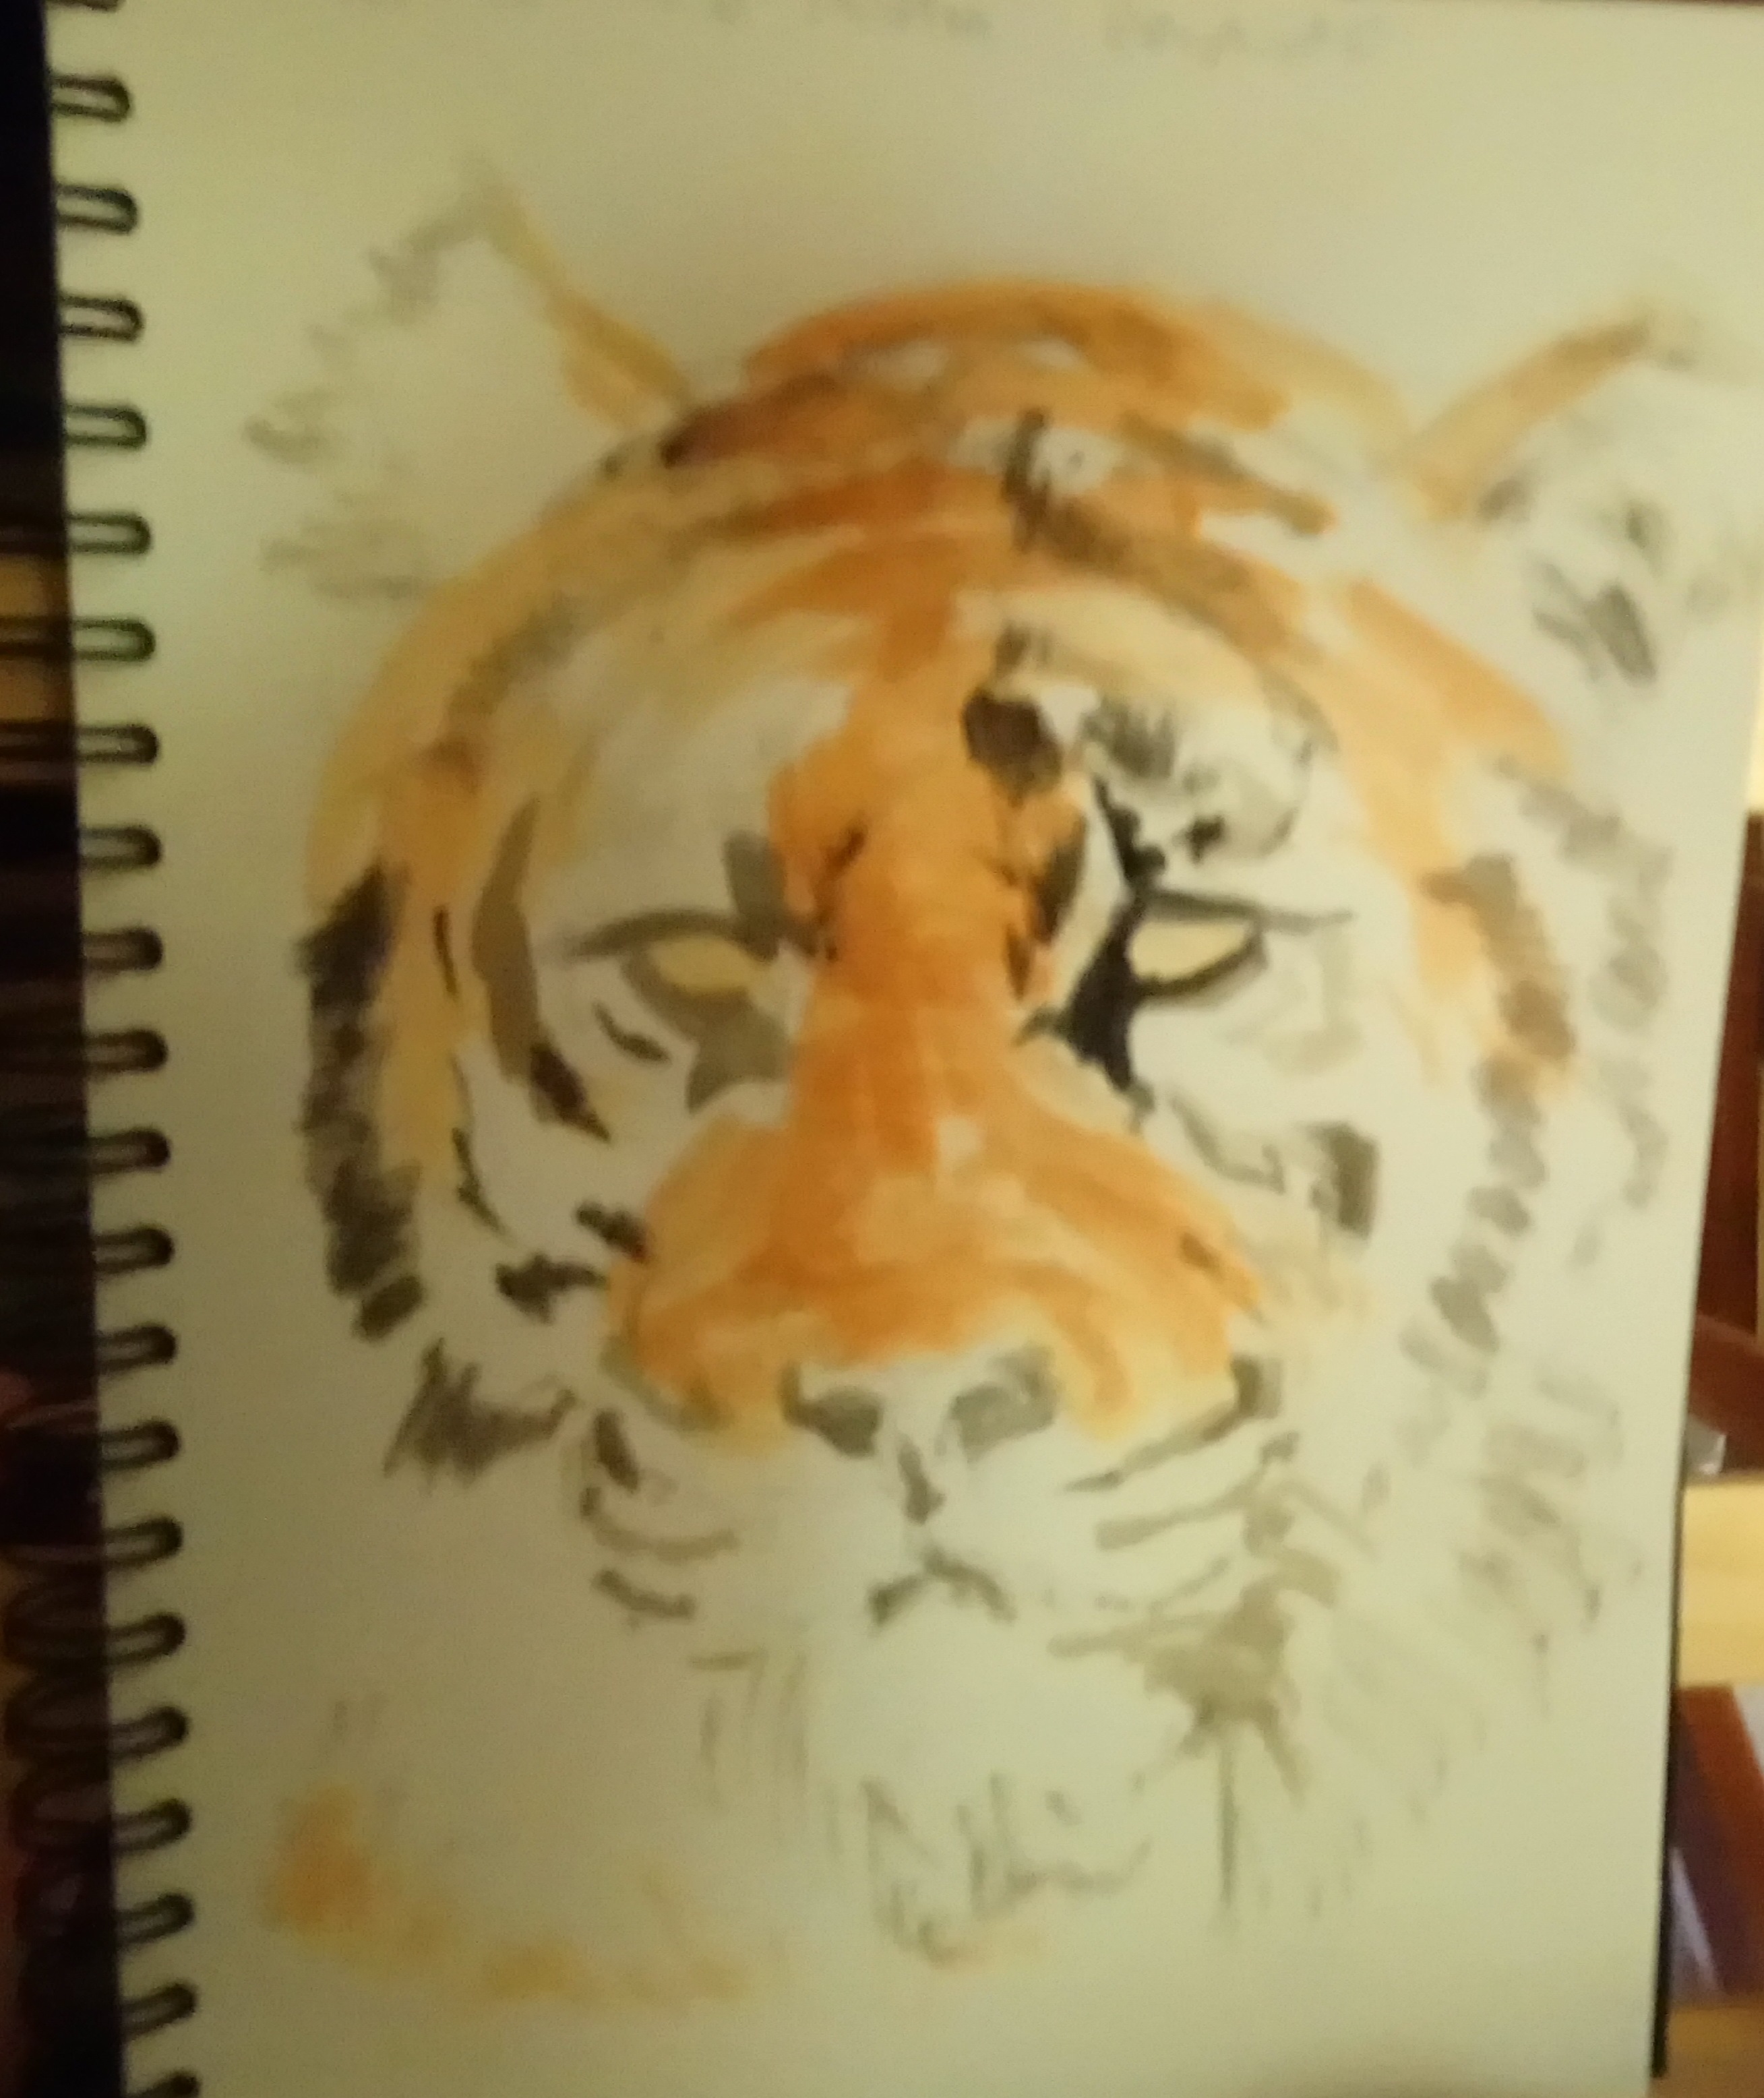
Then it was time to attempt a painting. I really wanted to paint a tiger from a photo I had uploaded from the web. I would have liked a print to work from but ended up using the camera on my mobile phone to take photos of the image on the laptop screen. Not the easiest thing to work with as the stupid phone kept timing me out, not to mention I had to hold it in one hand all the time while painting with the other. No sooner had I settled down with the easel on my lap when the phone rang (very odd sensation holding the phone and realising it was ringing while still balancing the paint palette and paintbrush in the other hand, not to mention avoid knocking over the jar of water beside me!) I decided to have a quick break thereafter and took a photo of the progress:
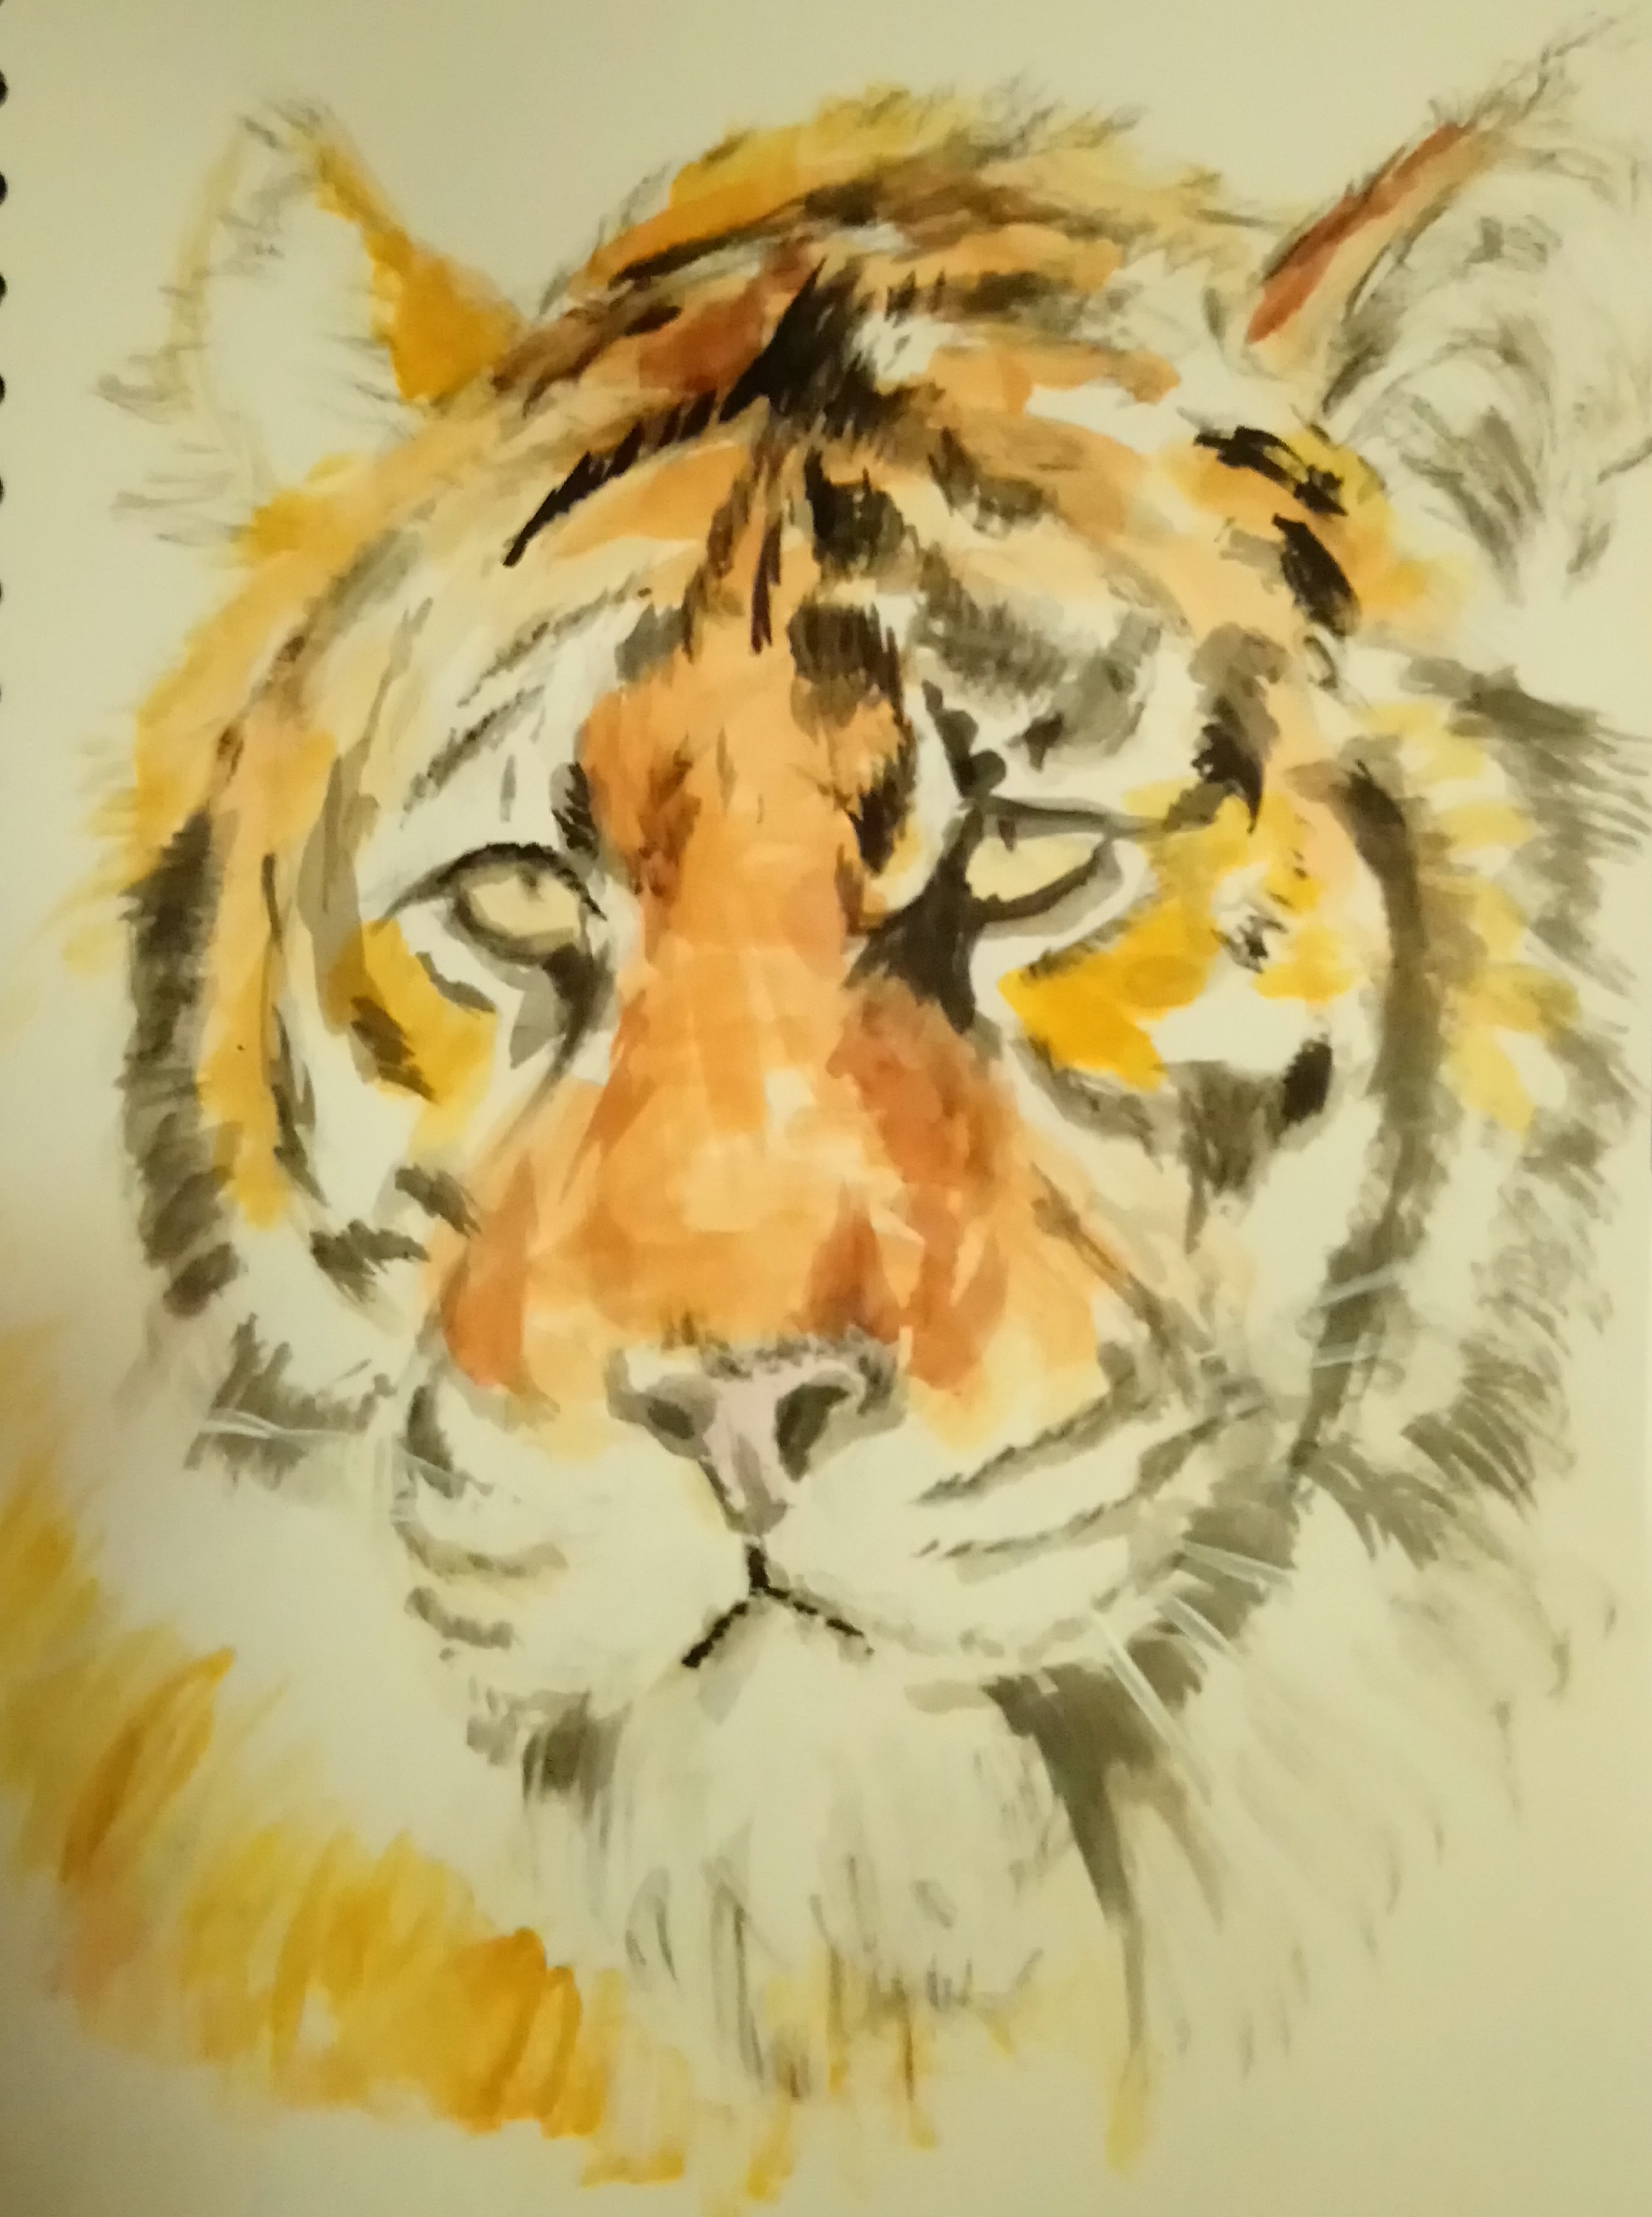
And the "finished" painting:
First, I do wish I had chosen something easier to paint! The mix of orange-brown, white and black patches proved quite difficult. And did you know that tigers have white whiskers? Painting white on white is not that easy LOL. My first criticism is that after looking at the photo and comparing it to the painting, the eyes are too close together. The other is knowing how far to go ... unlike a pencil drawing (my preferred media) when you can use an eraser, trying my hand at a watercolour was a lot more difficult. As this was after all, a practice painting, I don't think it looks too bad. From start to finish (with a 15 minute break) it took less than a couple of hours.
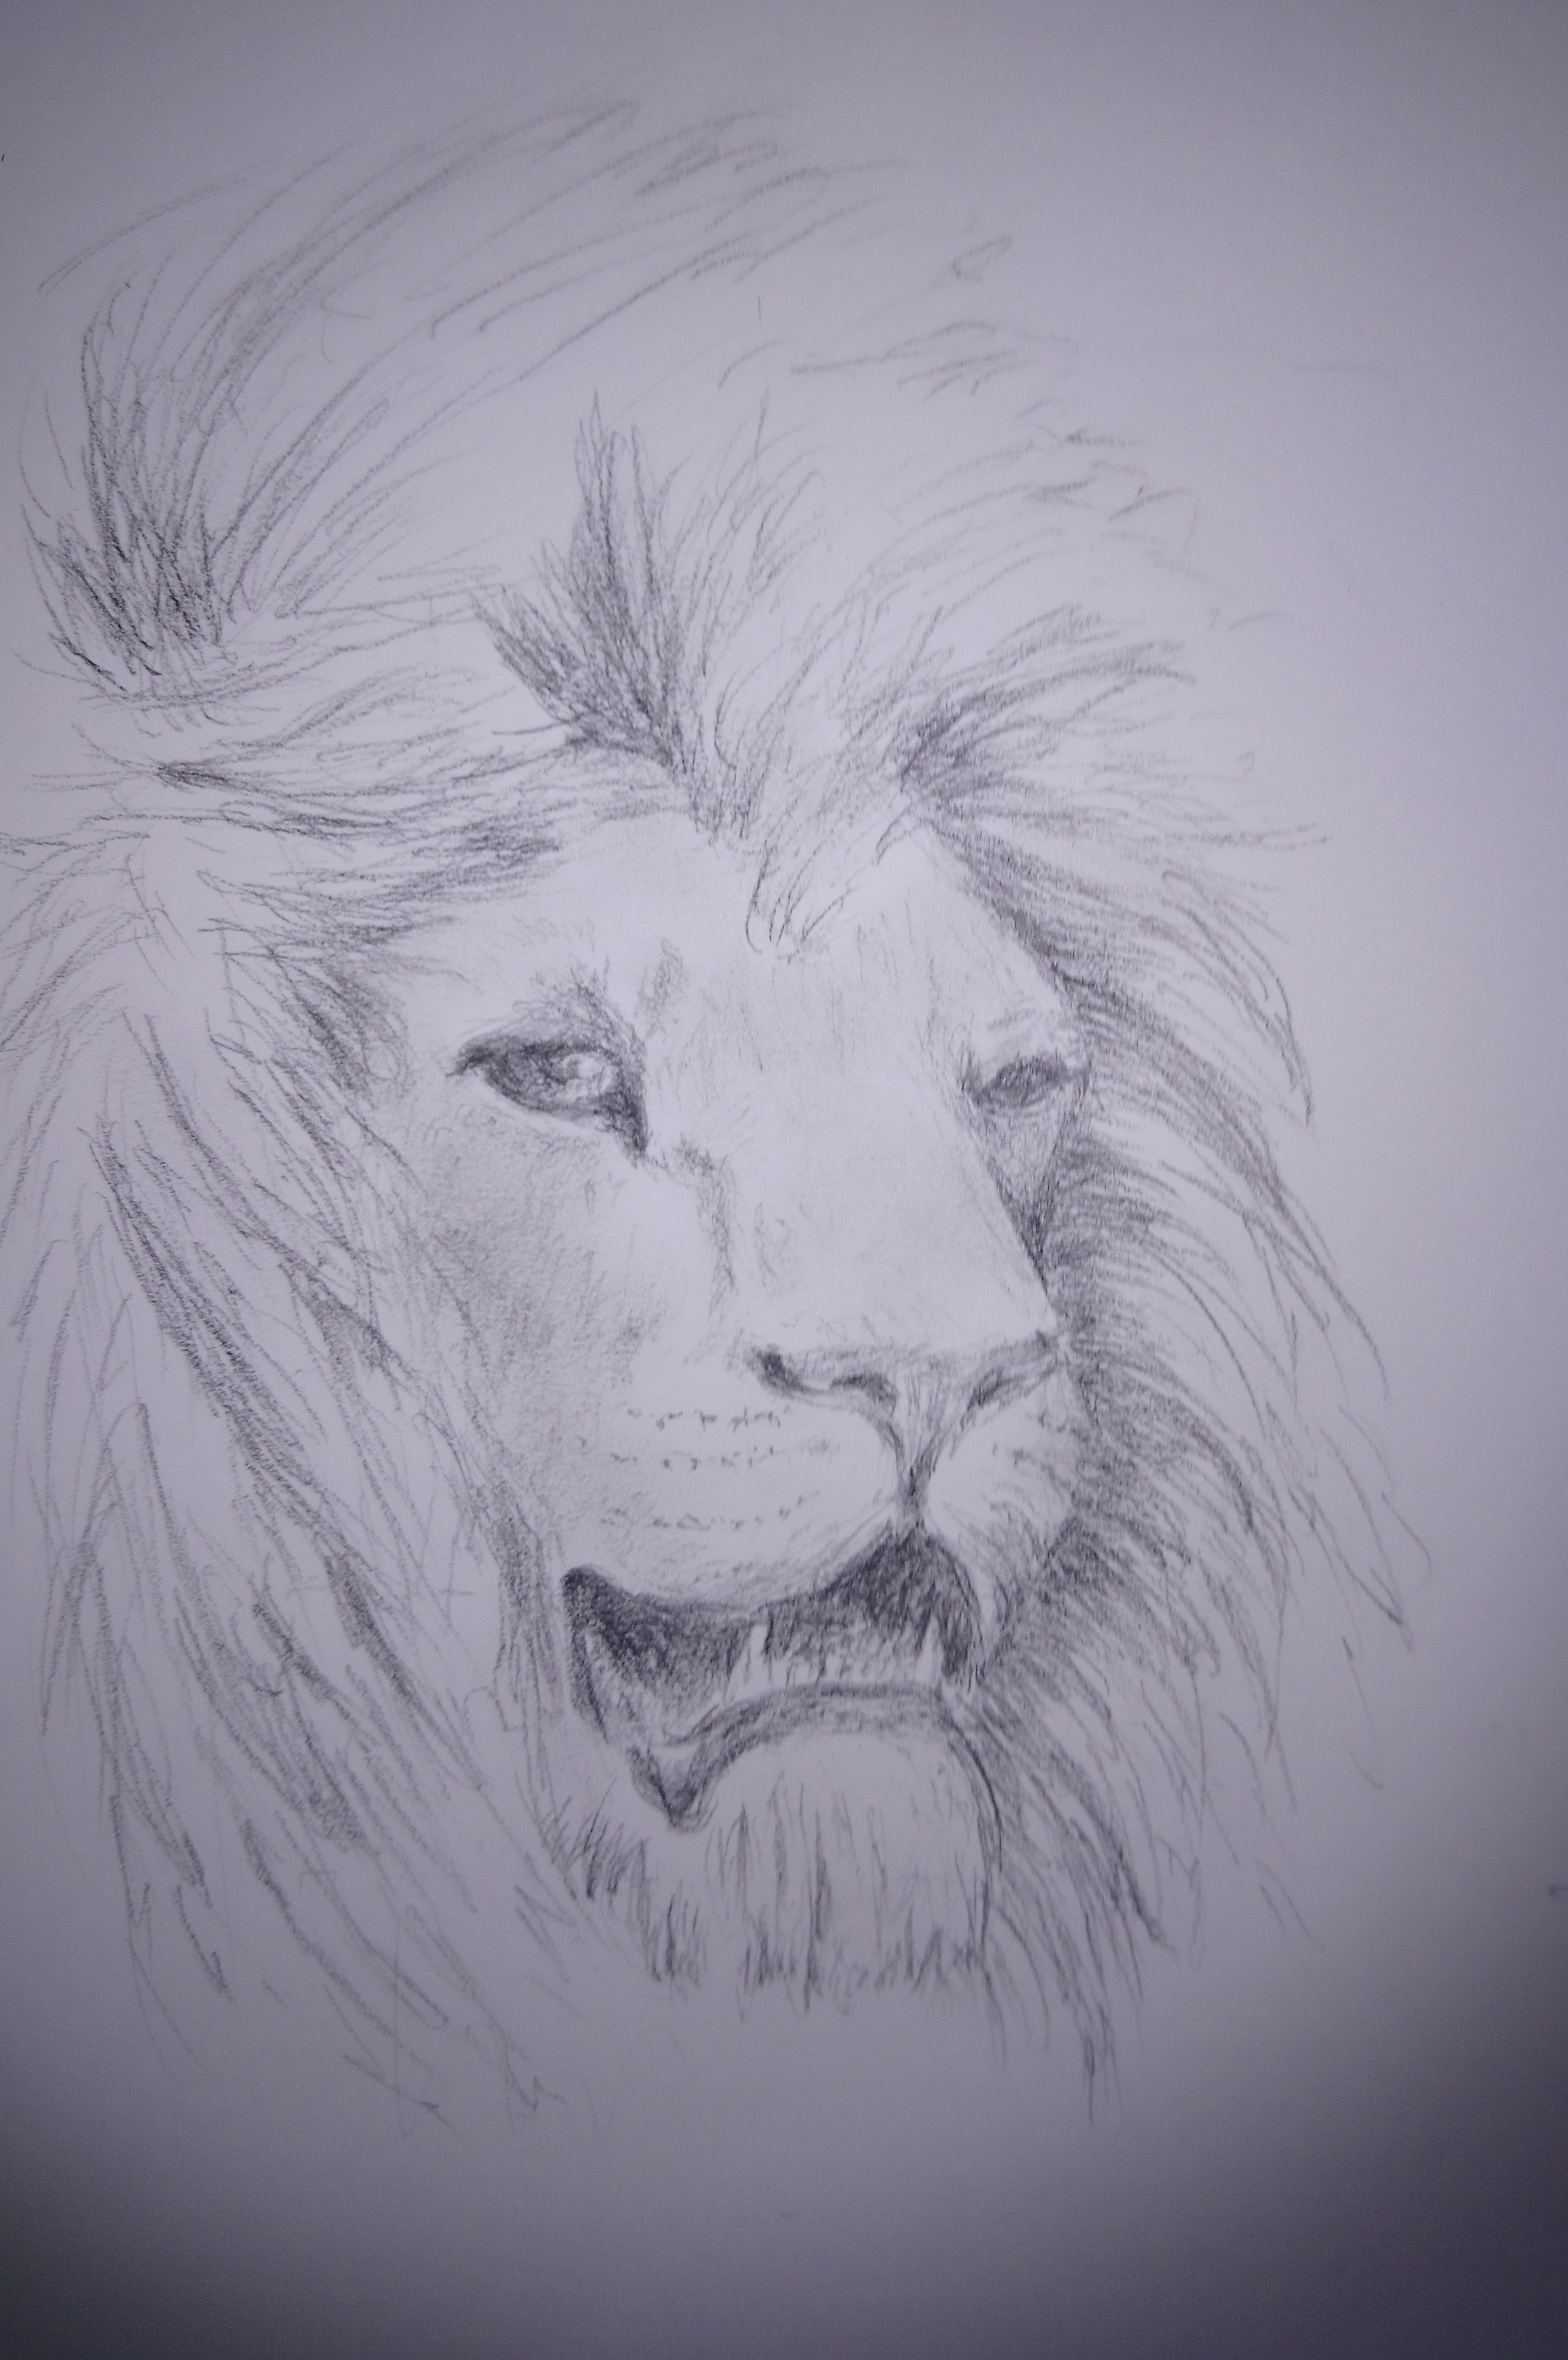
You may recognise the lion from the quick sketch I did. This time with a bit more detail (in the photo, the right eye is partially closed but it doesn't look right when drawn):
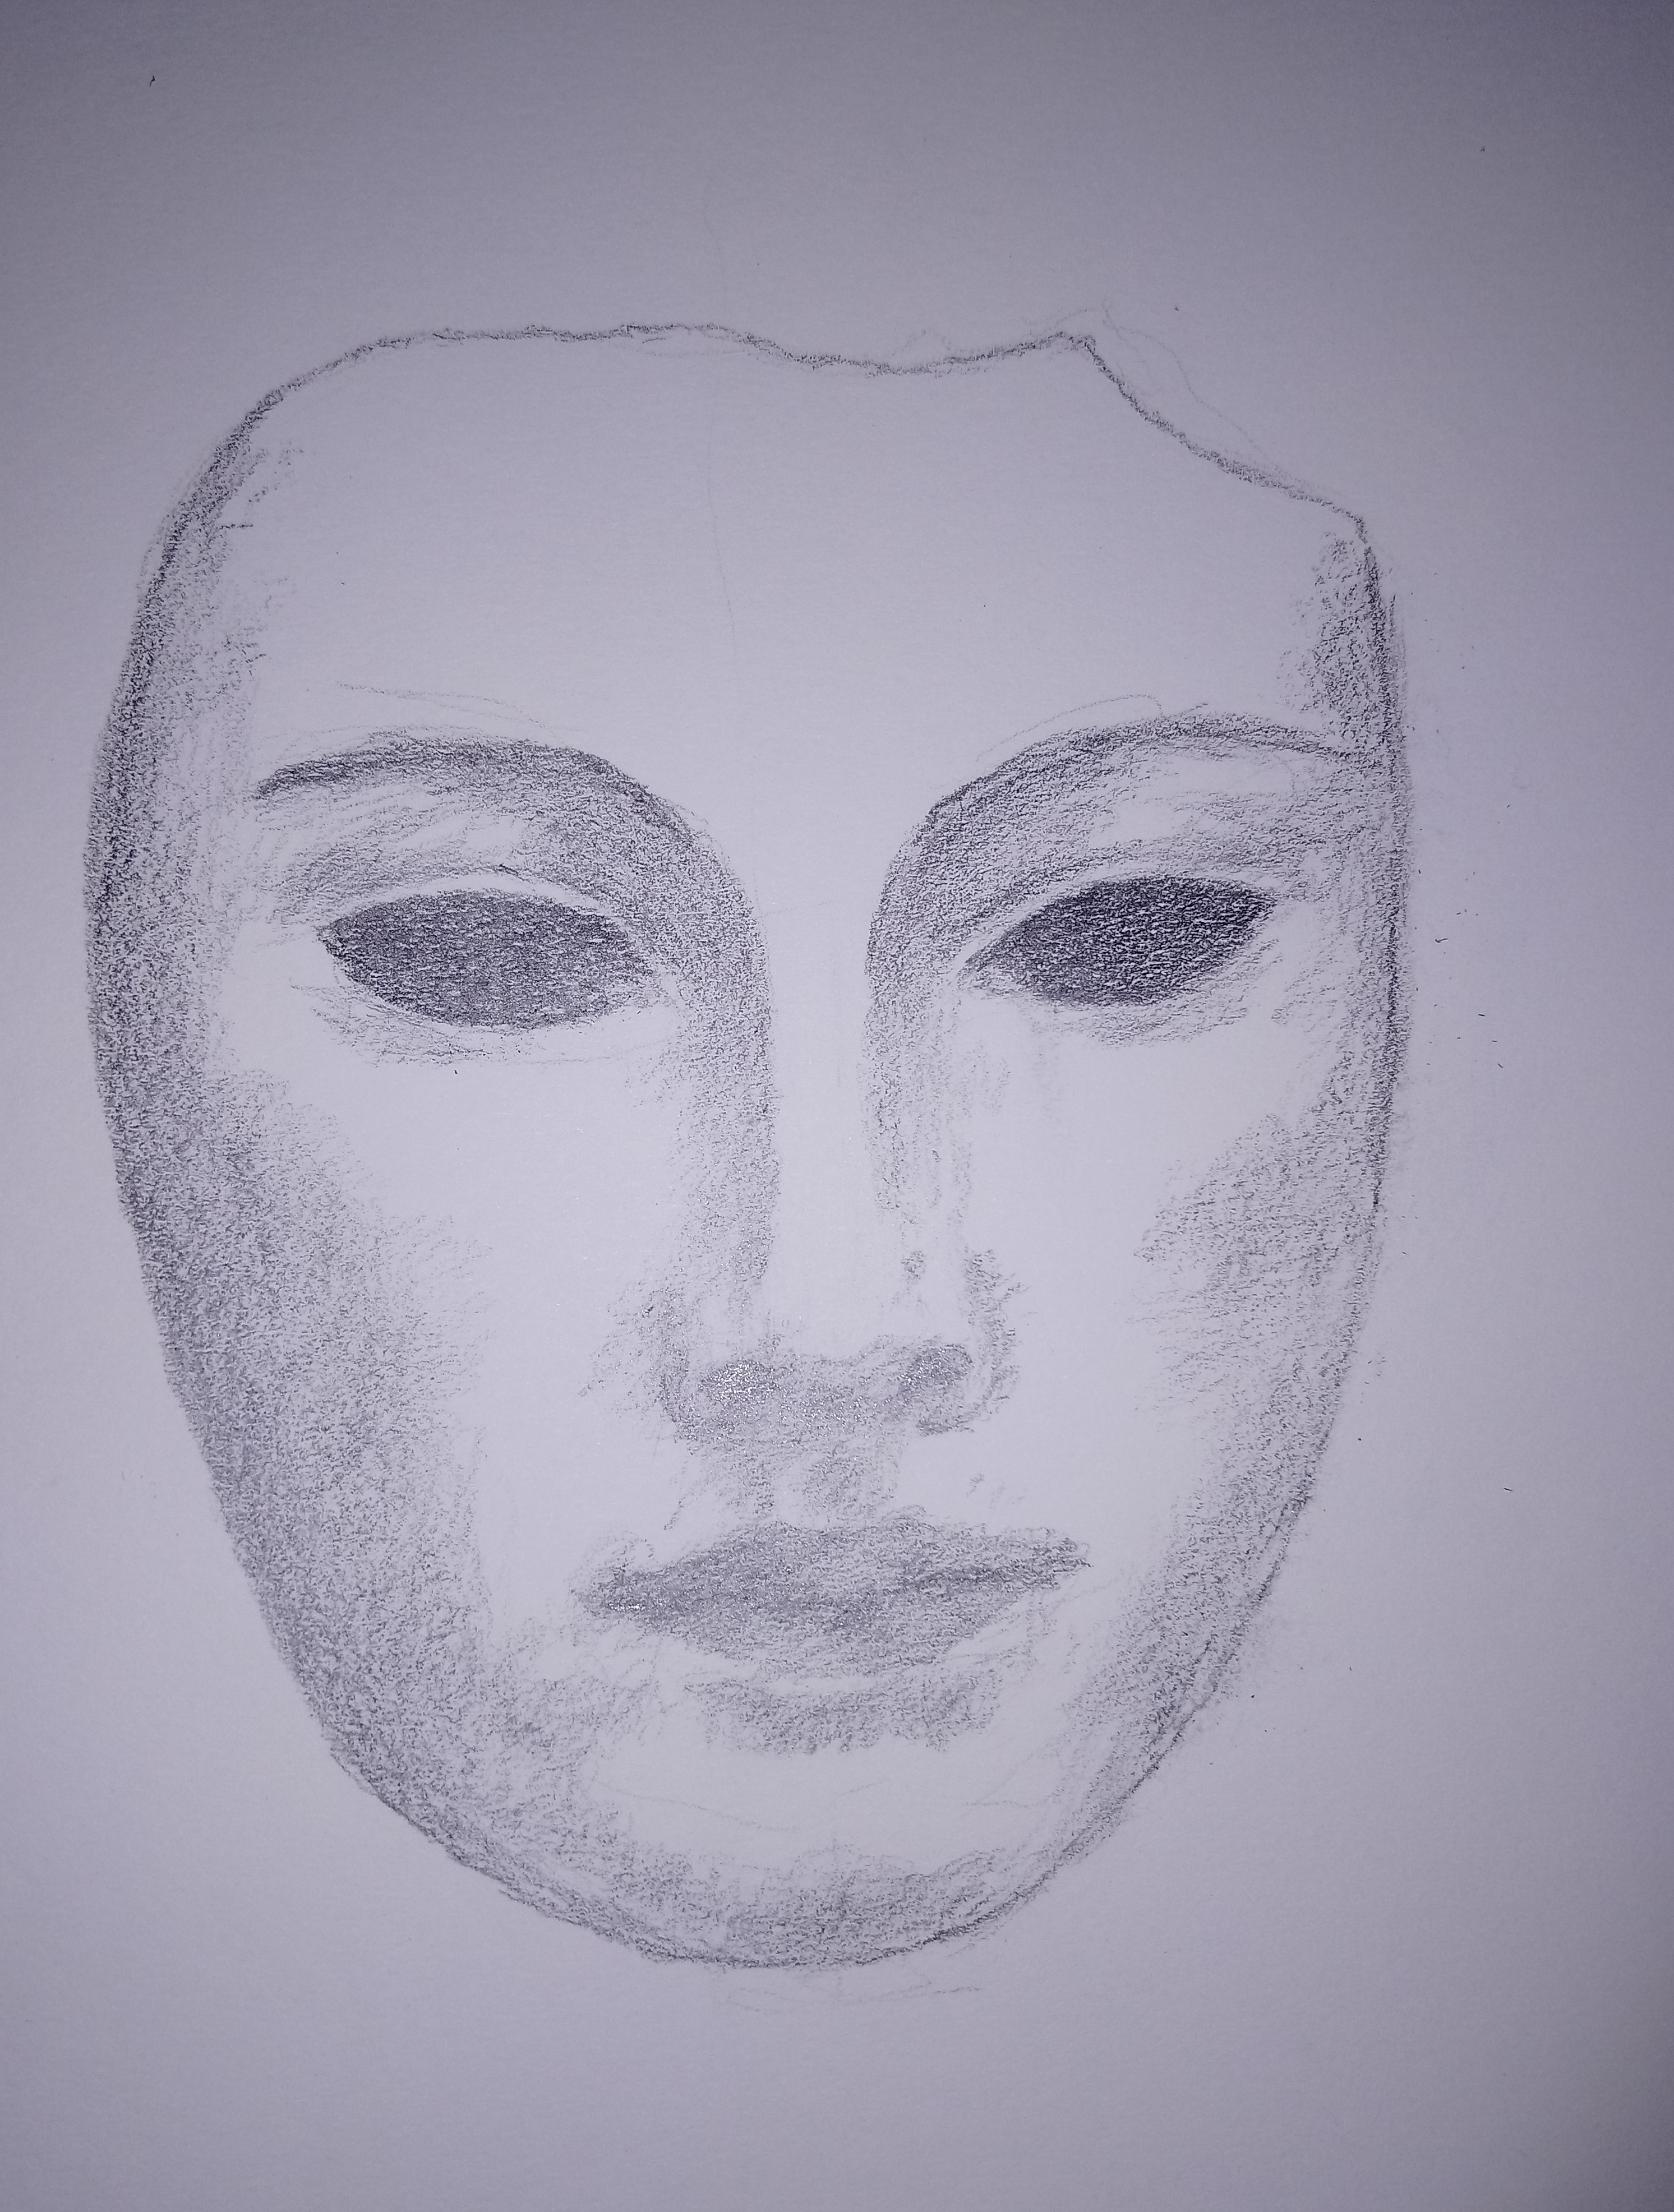
The next one is a face mask. I am getting on with some sketches of things I am hoping to put into a painting on canvas so this is just to get some dimensions:
I am quite happy for some constructive criticism (I am usually good at being critical of my own work but sometimes helps when others see something I may have missed)
I understand what you say abut the lion's eye not looking right but when transferring something from a photo to a drawing I would presume (but would not know) that adjustments have to be made due to the change of medium.
Trev62 wrote: ↑31 Jan 2024, 22:13
I understand what you say abut the lion's eye not looking right but when transferring something from a photo to a drawing I would presume (but would not know) that adjustments have to be made due to the change of medium.
In the first sketch I had not included the closed eye but made it look similar to the other, so as I'm not happy with the detailed sketch I might do as I did in the original (the photo I was working from was off a calendar so the quality is grainy which makes it difficult to see the subtle shadows when drawing, including the mouth. In the detailed sketch I think I got it more or less the shape I wanted but the photo details are dark and blurry so again, a bit of "artistic discretion" on my part) Currently I am just practicing my drawing (shape and shading) but I hope to move on to painting soon (that is, acrylic on canvas rather than watercolour - one reason for holding off at the moment is the fact that canvas is more expensive than paper)
The painting and drawing are really good, LL. I did O Level Art at school, but although I passed, it was nothing like the standard you have achieved. I love the tiger.
Spreckly wrote: ↑01 Feb 2024, 21:33
The painting and drawing are really good, LL. I did O Level Art at school, but although I passed, it was nothing like the standard you have achieved. I love the tiger.
aw, thank you Spreckly
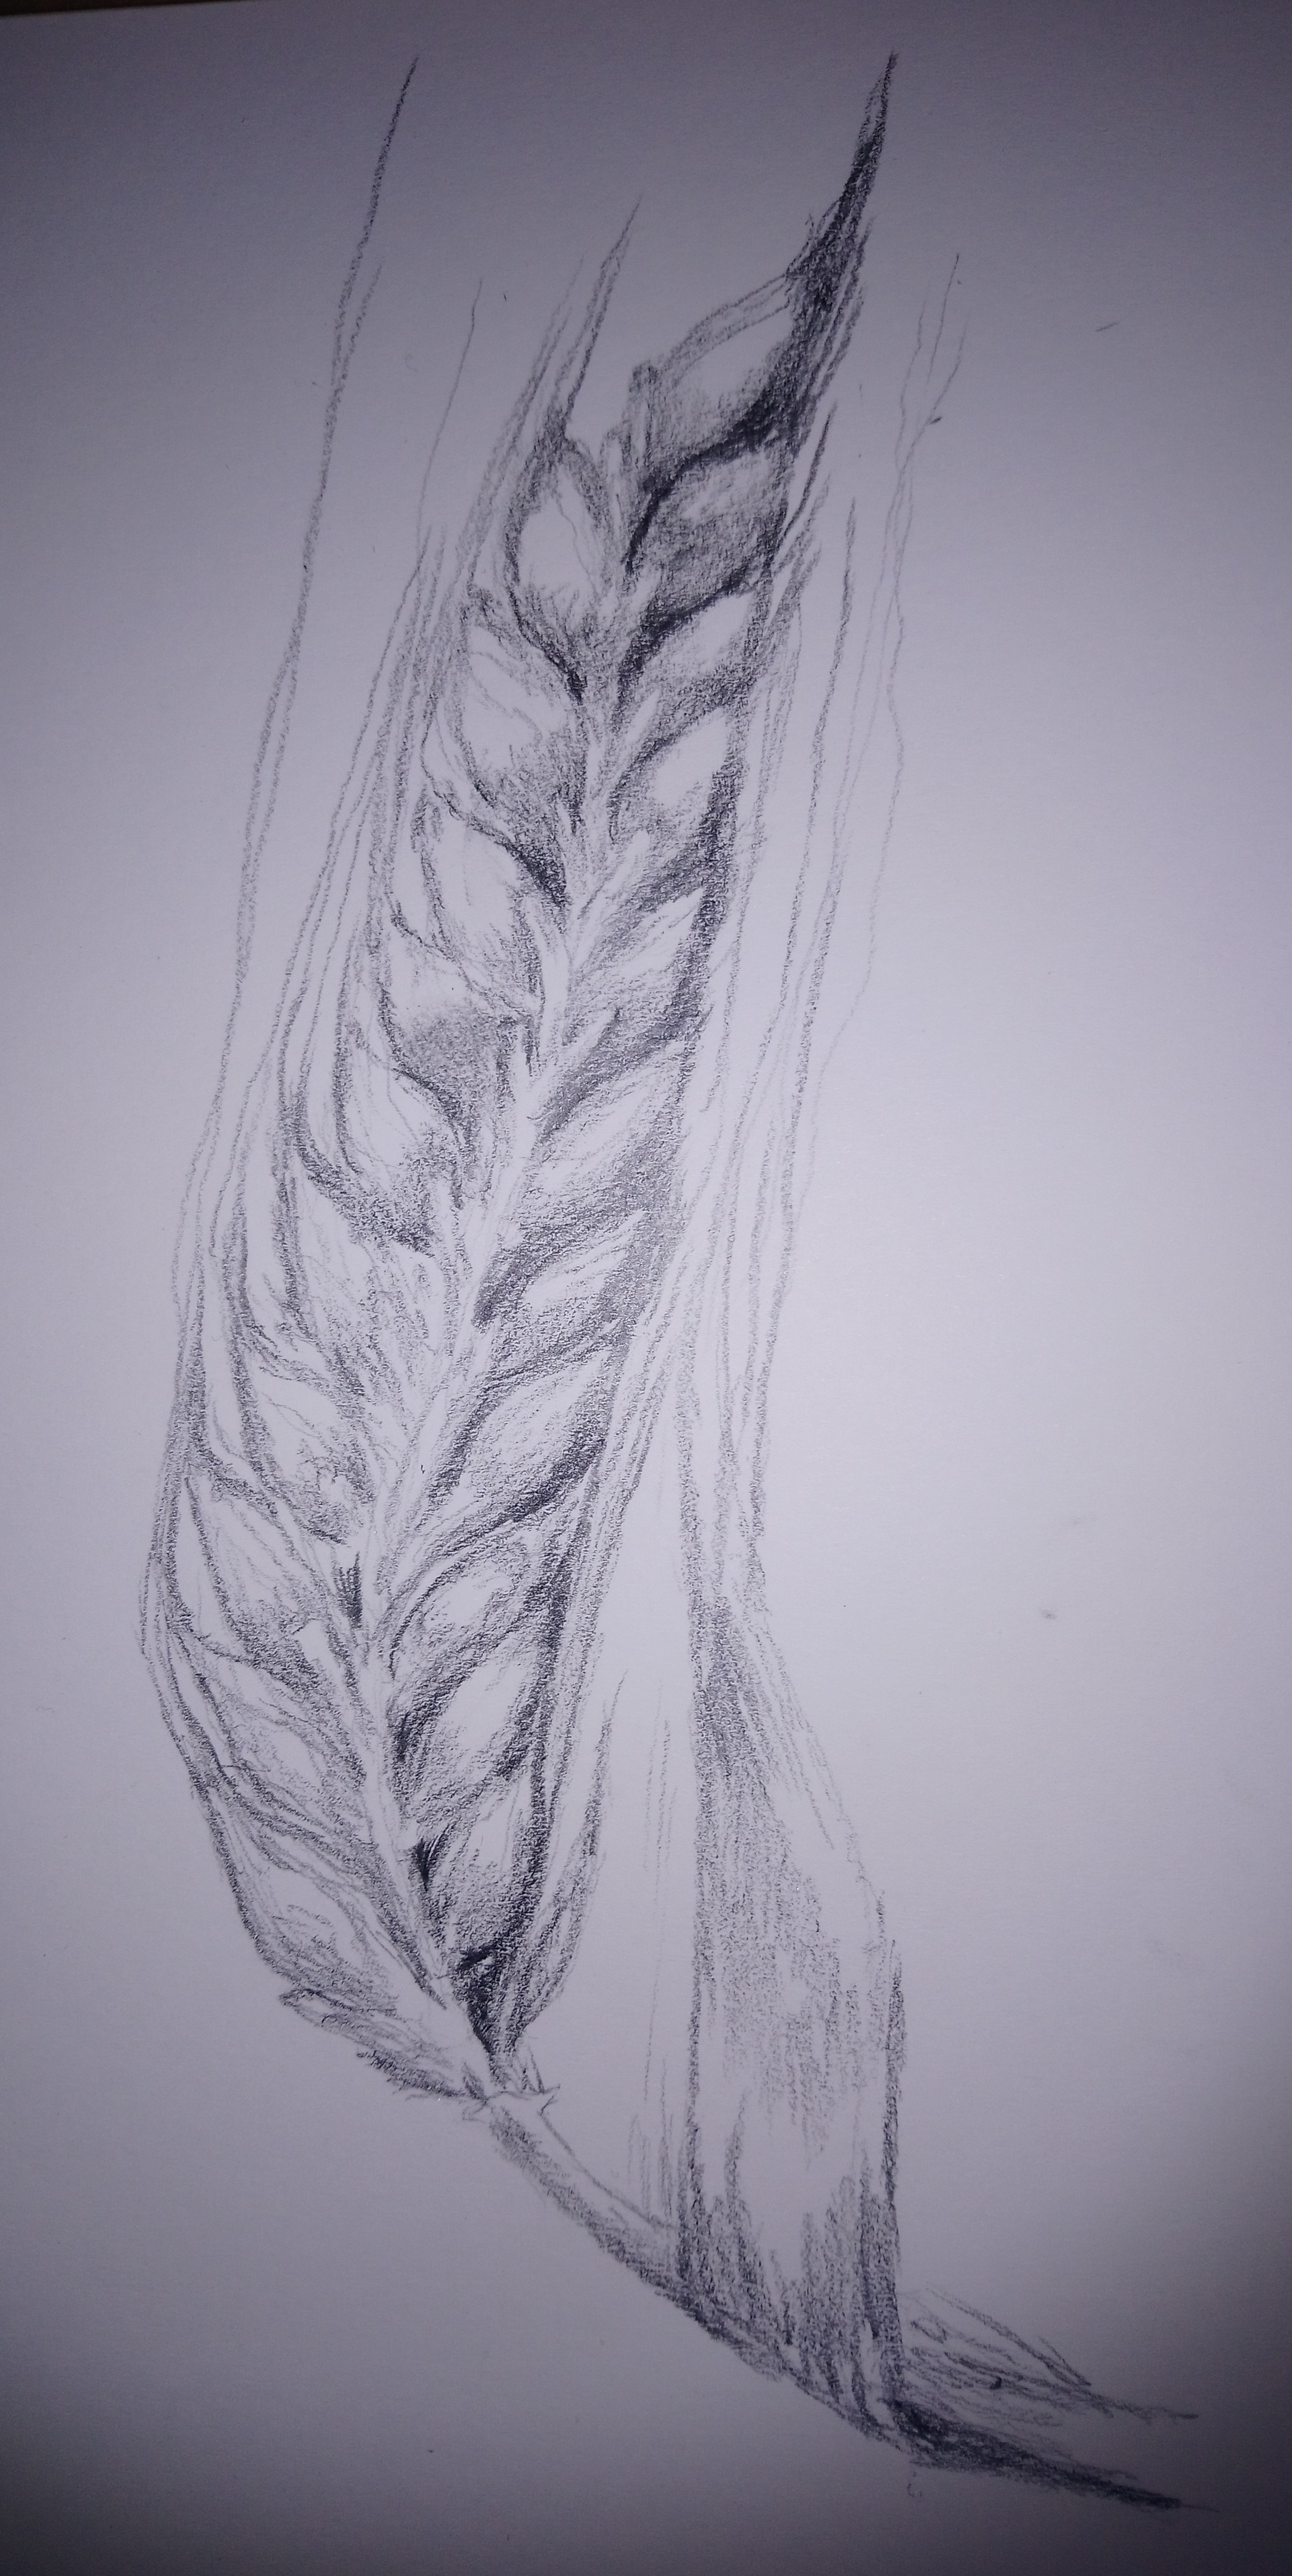
I've done a couple more sketches since my last post. I thought a dried rye seed head would be easy but it proved more difficult to draw (counting the seeds to make sure it was correct, then noticing the seeds on either side were not next to each other, lots of dried bits such as the leaves as well as in the seed head itself ... it all started to look a bit scruffy)
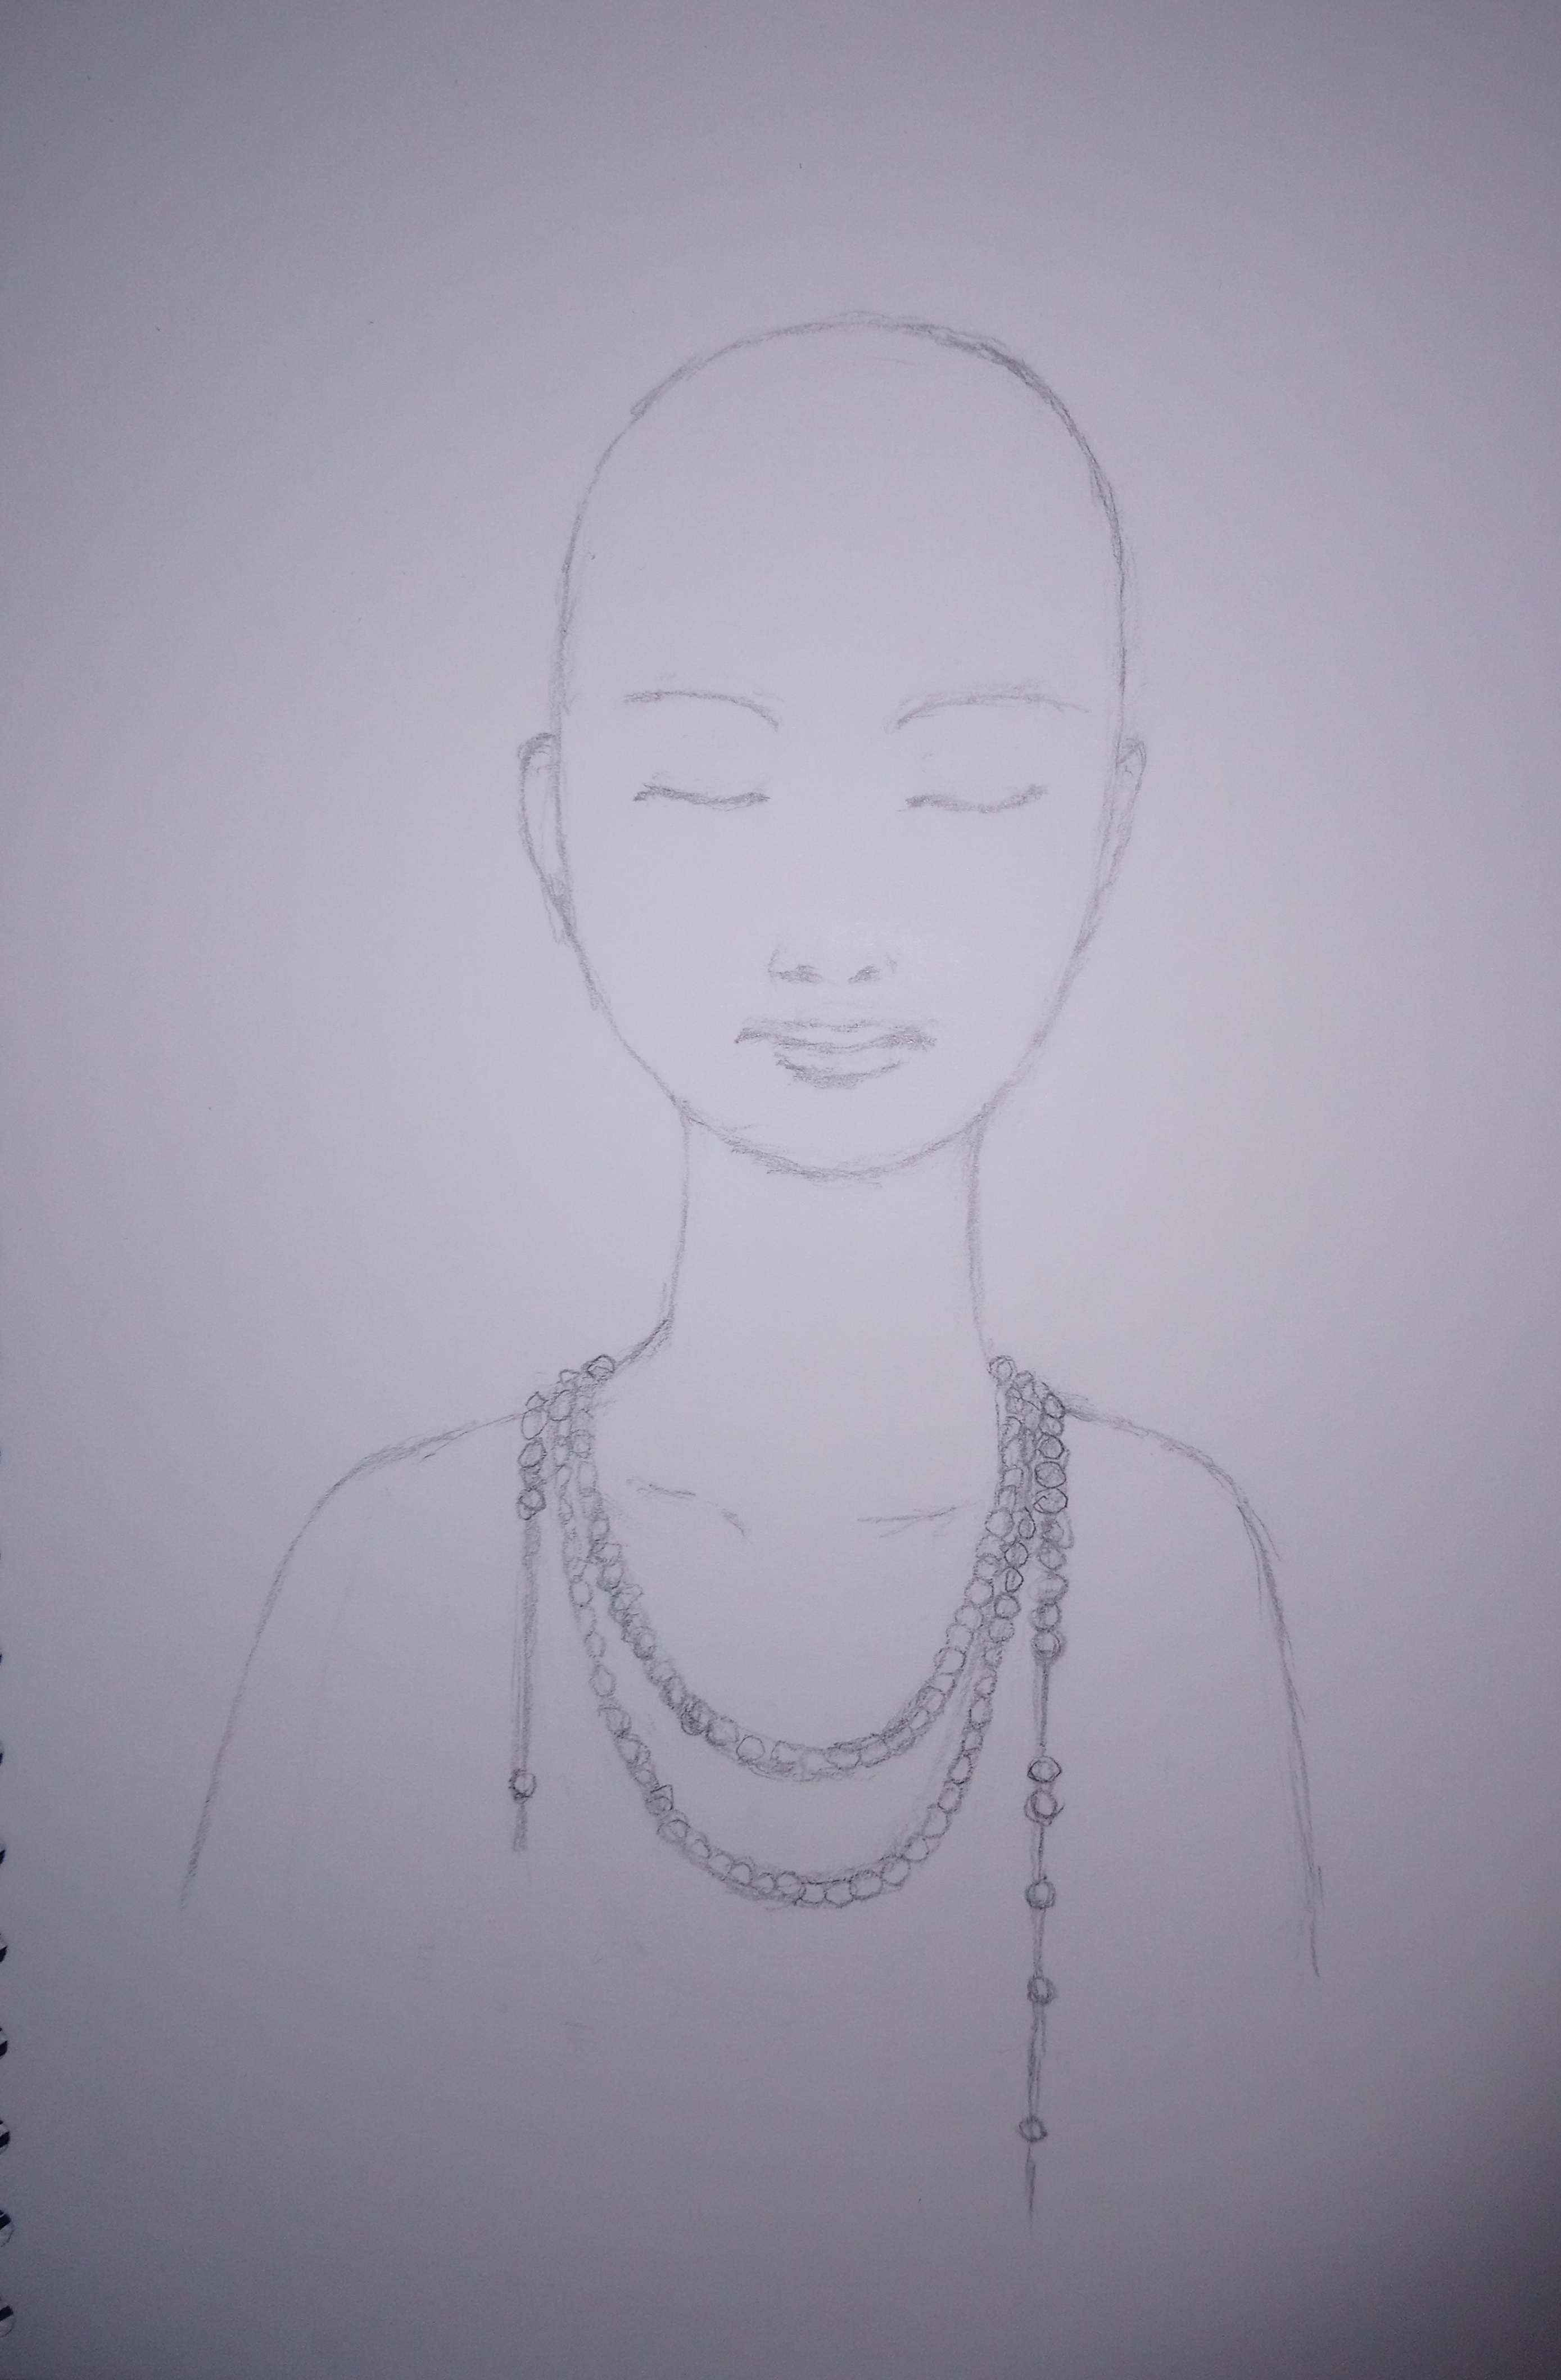
This next drawing is simple as I was just trying to get the dimensions for a planned painting I'm working on. It is supposed to be a mannequin head with a 3 strand pearl necklace with one of the strings broken (there's a story behind it) Well, the face seems oddly oriental (maybe it'll look different when painted) and I wasn't happy with the necklace. Hopefully it'll turn out how I visualise it when upscaled to the A2 size canvas.
On Friday I purchased some more acrylic paint (2 sets of metallic (gold and bronze shades) in 5ml pots, 4 different "pearl" colour shades in 60ml pots and a set of 5 fineliner pens of different sizes, plus a much needed board to mount sheet paper for painting and drawing. They all arrived late on Monday evening so yesterday I was keen to get on with some painting. First, I tried out the different paints and pens in my practice sketch book. Looking at the pearl shades, they are very similar to the metallic shades so I've concluded it's only the colour (pink, purple compared to gold, copper etc) that is different as they all have that same sheen (to be fair, the metallic shades were a different brand to the pearl shades) The pens are what I expected and am very pleased with them:
Then it was time to try out the new wooden board (A3 size) and moving up to the A3 size paper (ideal for final art work unlike the cheaper sketch book I've been using up until now) In school I remember mounting the paper onto a board by lightly dampening and carefully stretching it (a bit like hanging wallpaper to a wall but using water not paste) and then sticking the edge down with brown paper tape (aka parcel tape that you wetted) so that the paper didn't ripple up when using water based paint. Well, I didn't have paper tape and the closest I had was some dwindling masking tape. I hadn't intended on doing a full blown painting so decided to omit the "stretching" the paper bit which I regretted soon after I started ...
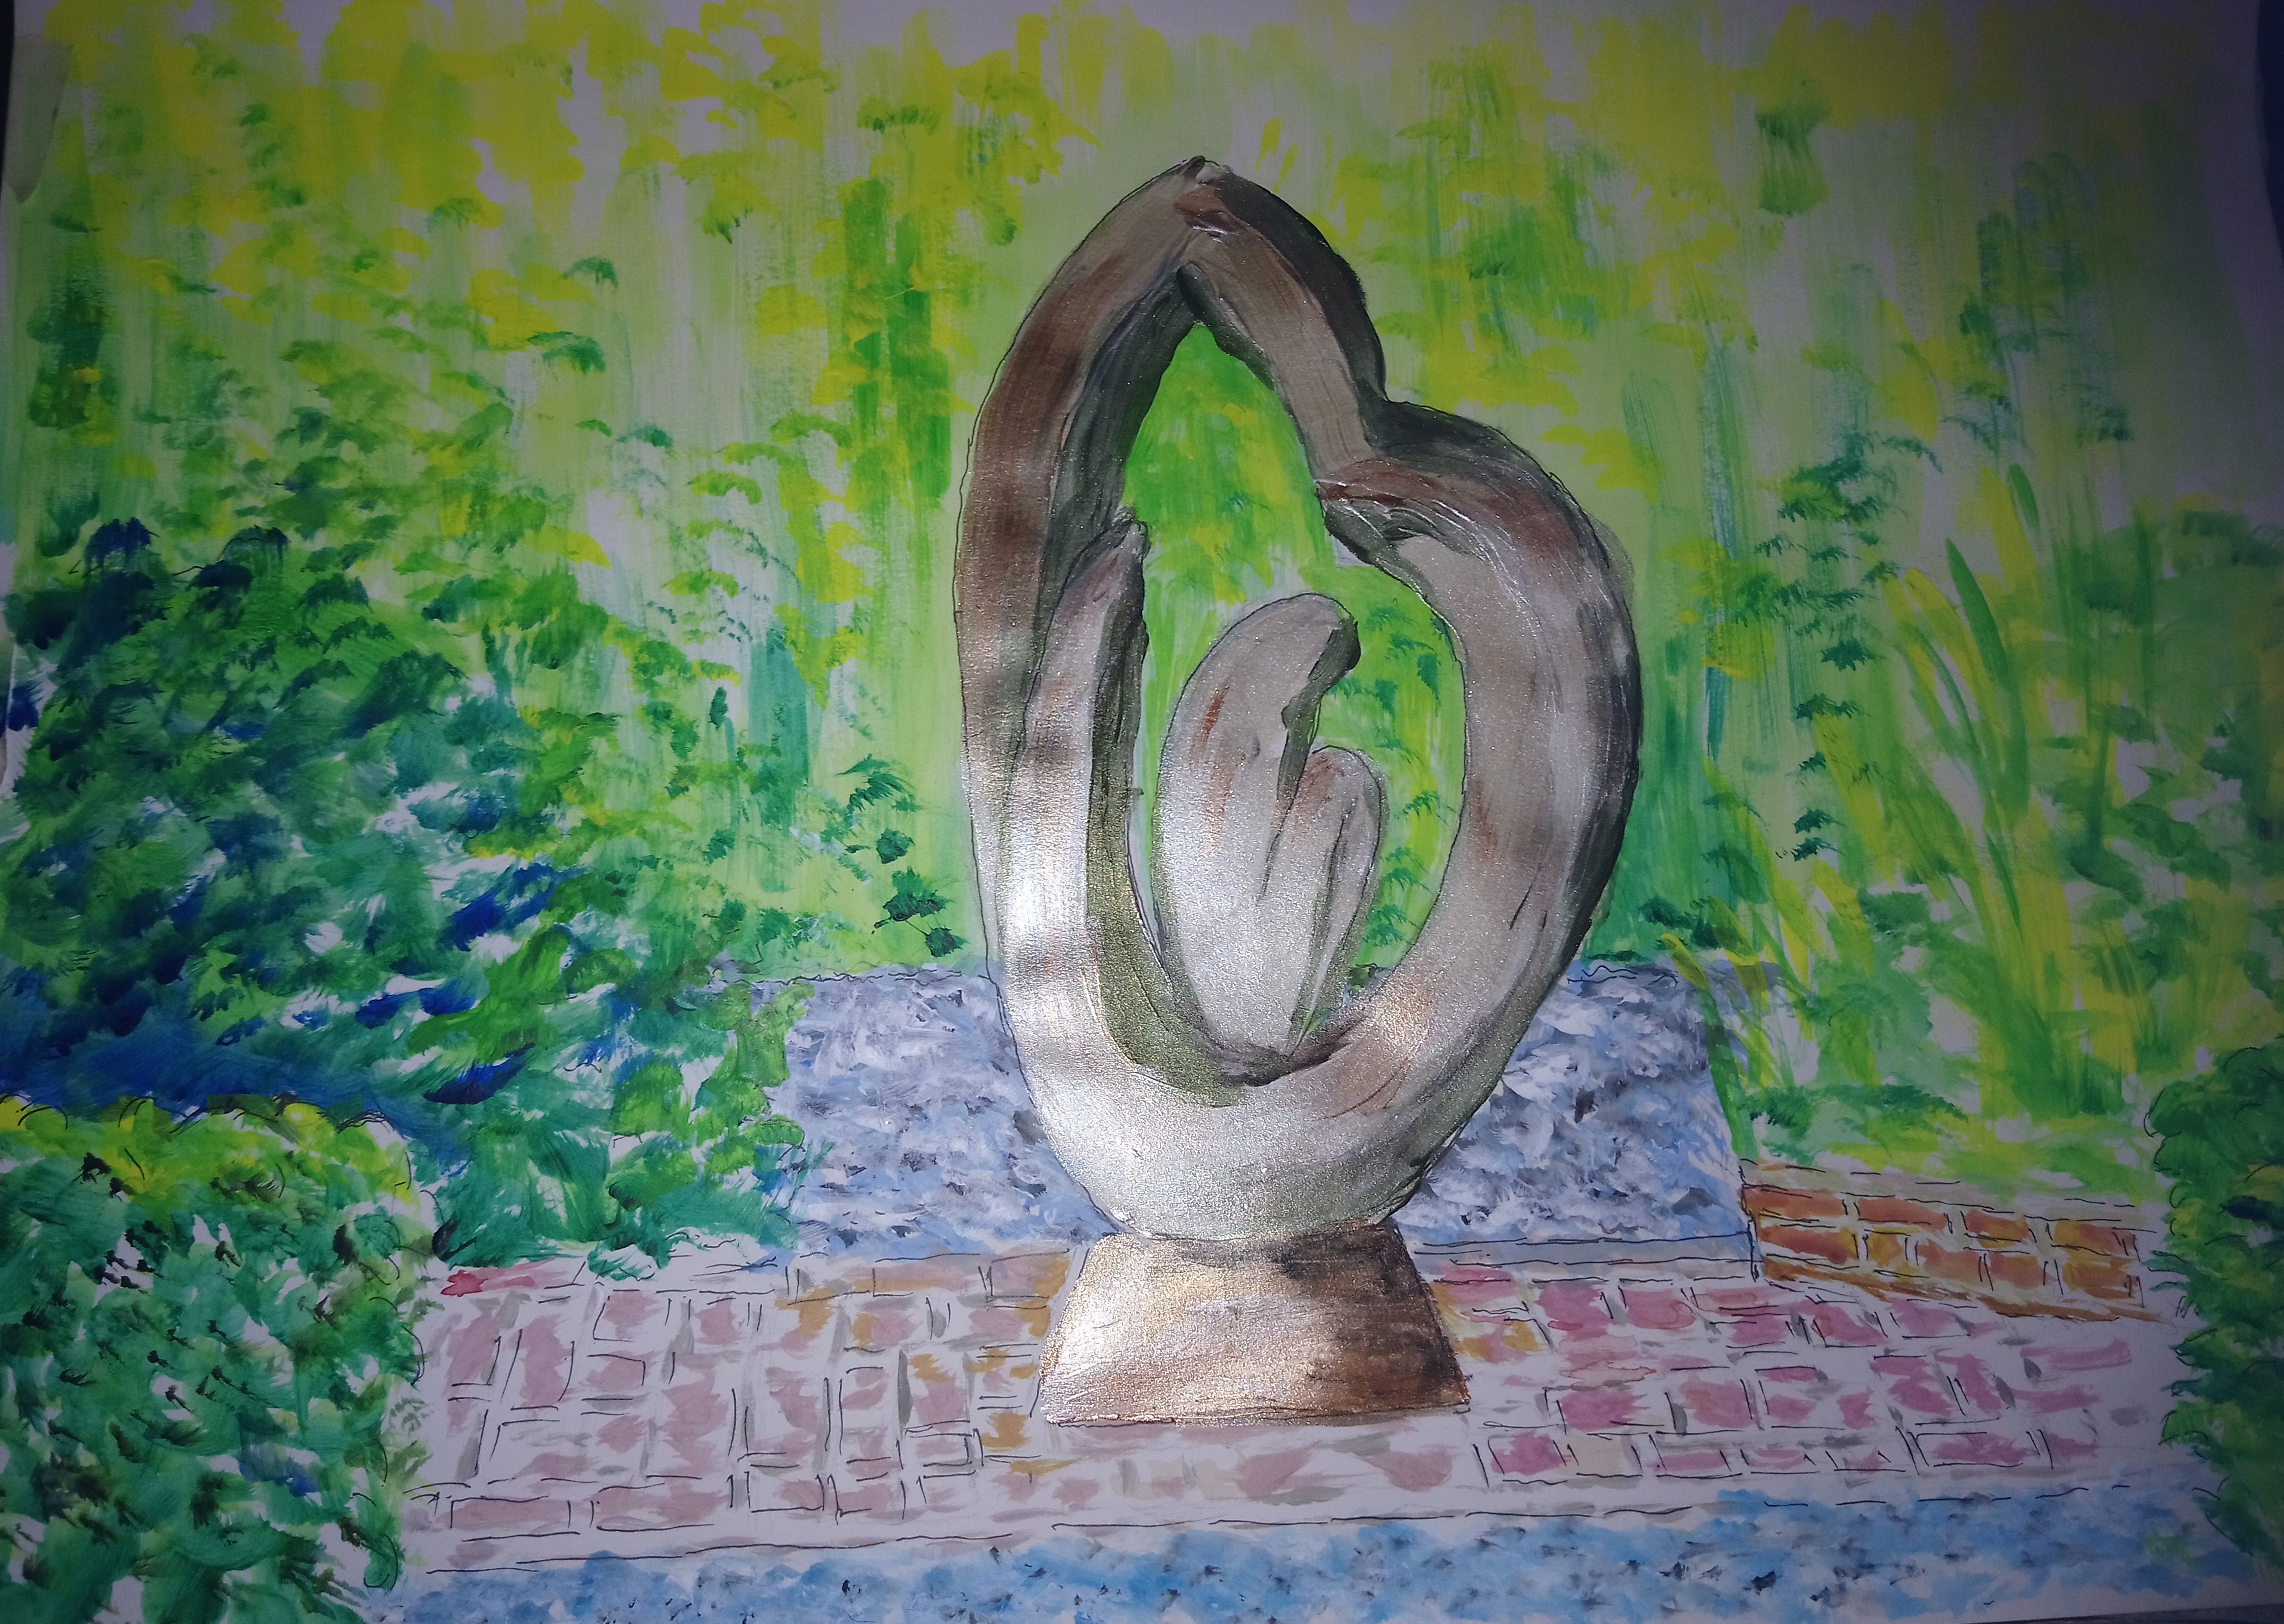
I was keen to try out my new metallic paints and had decided to paint from a photo I found on the web of a sculpture that is sited in my local park (I often walked my dog in the wall gardens where it is located. I vaguely remember it being a dark copper / bronze look about it but the photo in the link looks more like stone - it has been many years since I last went to the park so my memory may have been flawed) After doing a light outline of the sculpture in pencil, I was aiming for a light green background but it soon became a bigger task than anticipated as the foliage needed to be put in, not to mention the brick paving that the statue was sited on and the gravel paths behind and in front of the sculpture which look more like water in the painting. I tried using one of the fineliner pens in the hope of improving it but I'm still not happy with it. The photo of the painting actually looks slightly better than the painting itself - it really did not turn out how I visualised it (it looks very amateurish) but thought I'd post it here anyway to remind me that I still have a lot of practicing to do.
A close up of the sculpture looks slightly better and captures the metallic look and the original background I was after, but unfortunately also the "gravel" and brickwork. I think I should stick to drawing and painting animals ...
One of the ideas I have for a painting is to have a bit of a cracked glazed ceramic appearance and I had been googling for images to work on. During the search I came across products that actually have the same effect called crackle media (in the 1990s there was a craze for creating "distressed" furniture painting which looked like aged paint that had cracked, and this was very similar)
This video explains the process (beware that it does go on a bit but I think it is one of the better videos):
I bought a small bottle which arrived last week and I was keen to try it out.
First, either I need new reading glasses or the small print on the side of the bottle really was meant to be viewed using a magnifying glass. After trying to read the instructions, I concluded that it didn't have any so I decided to use the method as described in the YouTube video above.
So I did a series of different colours of acrylic paint (2 sets of blue, yellow, green, red and then one set had black and the other set had white (yes, white acrylic paint on white paper) and left them for the paint to dry to dry out. Then I coated both sets with the crackle media and left overnight. The next day, I used black acrylic paint over the set of colours with one block containing the white, and white acrylic paint over the other set of colours including the block containing black paint. I was careful not to overwork the top coat as advised in the video and ... nothing. Not even one tiny crack Luckily this was just a test in my sketch book rather than the final painting but very disappointing all the same (not much point taking a photo as all you'll see is a set of black and a set of white blocks)
I went back to where I had purchased the crackling media and now wished I had read the reviews more closely (now that's a lesson to learn before purchasing ... luckily the small pot was very inexpensive so I'm not upset about the cost but it's the fact that many people had the same problem)
Here's the item description:
quick-drying professional art, craft and hobby artists medium, Speciality medium ensures your make stands out from the crowd, cover all surfaces with ease, ideal for travel artists
Wouldn't you be impressed if you saw this!
And these are just some of the reviews:
1. A 5 star review:
This works well if applied between two layers of paint. Good even crackle effect exposes base coat. Was dubious about buying this after reading reviews but it does work well
Well, that's what I did but got nothing there, so that review was very unhelpful.
2. A 1 star review which I can relate to by buying a cheap option for a small amount in a project:
Absolutely rubbish buyer beware. Read the reviews very carefully as most refer to a normal paint colour and not this crackle glaze which is very misleading. I have tried with 2 surfaces and 3 paint colours to make this crackle. I’ve tried using heat and not using heat and none of the variations have worked at all, not one crack!! I’d give this zero stars but there’s no option. It should not be for sale. Definitely buy another brand. I bought this as a cheap option as I only needed a small amount for a project but it was a waste of money and time, don’t waste yours.
3. A 2 star review:
No instructions. However found company email, and they replied promptly. Product not great, managed a little of crackle on maybe a fifth of my project.
There were over 144 reviews but you can see the range of responses.
So I guess it is back to the original plan of painting the cracks by hand ...
Meanwhile I decided to post photos of some of the drawings & paintings on my Facebook page (limited to my friends rather than global) and was very pleased with most of the responses. My old high school friends who were in the same art class as me were very complimentary ("you haven't lost your touch") and some of my science friend/colleagues didn't know I had another side to me ("Wow, I hadn’t realised that you had an artistic eye as well") Even the sculpture painting seemed to get a lot more thumbs up than expected and I started to look at it differently. I still think it looks amateurish and needs more work. Most thumbs up were for the tiger painting. Have to confess overall I found all the comments uplifting.
My next drawing will be to use the Fineliner pens. Back in school we used to use dip pen and ink and how many times did I have to "hide" a blob and make it look like shading! So I'm keen to try out the new pens. The downside is that it can be a lot more time consuming than using pencil or charcoal (if you make an error there, it's easy enough to erase but with pen, it is a permanent error hence more caution than free hand)
My latest is what I would have called a pen & ink drawing (when you would dip the pen nib into ink to draw) but using Fineliner pens are so much better (no more accidental blobs to disguise!) It feels like I'm cheating but the time taken to do what I thought was a small piece still took a lot longer than planned.
I drew from a photo of a wolf's face close up (that is, just the eyes) The issue I had is that even with the largest Fineliner pen size in the pack, it was too small which made blacking out large areas very time consuming. I can't decide to leave it finished as is, or put a bit more in. And I was wondering about adding colour to the eyes (maybe a sort of straw coloured shade), what do you think? My criticism is that I don't think I captured that "menacing" look and the face could be any animal (a dog or racoon)
A friend of mine suggested opening the photo I'd taken with Paint on the computer and digitally add colour so that I can decide BEFORE colouring in the original artwork. She also suggested blue eyes but I think the yellow eyes look better:
I think using the Paint (or whatever editing software) is an excellent tool to preview a colour addition. The downside is that Paint has limited colour shades (and using the mouse as a "paintbrush" feels clumsy, but at least it gives me a good idea if it works or not) Still, I'm very happy with the outcome
Wolf eye colors vary from yellow to brown, and can also include green, blue, and amber.Some factors that affect wolf eye color are:
Age. Wolf eyes are blue when they are born, and change color after a few weeks, usually passing through a green phase.
Genetics. Wolf eye color is determined by the amount of melanin in the iris, which is inherited from the parents.
Environment. Wolf eye color can be influenced by the light conditions and the surroundings of the wolf.
lancashire lass wrote: ↑04 Mar 2024, 11:04
... when I was "painting" the yellow and blue in the photos, I did consider green
And here it is:
Meanwhile I have been trying out my recent new purchases
Someone suggested acrylic pens (along with a lot of new art products on the market these days, I'd never heard of them before) to fill colour in the pen & ink drawings. While searching for the pens online, there was an overwhelming selection of pens (I've usually been good with google searches, but this time not so) There was also a range of prices from cheap to very expensive - sorting out what I wanted and could have afforded was not easy. I was also persuaded by the packs with a greater selection of colours (the restricted colour palette of the Paint software for the wolf examples show they do not look very realistic, and with the pens I could change the shades more easily so that it doesn't appear monochrome) The pens I selected were dual ended - that is, a fine point at one end of the pen, with a broader point at the other. And the 24 pen set was in my price range (have to confess I felt like a kid really wanting the bigger pack of 75 pens instead )
I also wanted to get some soft pastels. I've never used pastels but I do remember attending the art exhibition for the final year high students doing art (one of my artwork was selected for the exhibition ) and I was wowed by a particular drawing by someone from another school using pastels. So I was keen to give them a try and they weren't that expensive (again, I went for the set of 24 colours)
First, trying out all the colours of both pen and soft pastels on white paper in my sketch book. The paint pens felt and looked more like any other felt tip pen (you can supposedly use water to do a watercolour with them) As for the pastels, they felt a lot like charcoal stubs when handling:
Then I repeated the same exercise in the new pad of black paper I'd bought. The first thing I noticed is that the colour of the paint pen was affected by the black paper ... I was hoping they would retain their colour so clearly not acrylic as I had thought. I was a bit disappointed but they'll still have their uses on white paper. Meanwhile I thought the pastel colours on the black paper really popped out, almost illuminated which I like.
The photos above were taken before I used the fixative spray to stop the pastels from smudging when handled. The fixative worked fine on the white paper but when used on the black paper, some colours (the green on the top left side and the blue on the bottom left) looked dull afterwards, even after the fumes had lifted. Perhaps I had been a bit too heavy handed with the spray so I'll try to remember that next time. Other than that, the fixative did the job (I had to try the smudge test) and although I'd seen a change in the colour before and after using it, overall I was still pleased.